{
"info": {
"author": "Samapriya Roy",
"author_email": "samapriya.roy@gmail.com",
"bugtrack_url": null,
"classifiers": [
"Development Status :: 3 - Alpha",
"Intended Audience :: Developers",
"Intended Audience :: Science/Research",
"License :: OSI Approved :: Apache Software License",
"Natural Language :: English",
"Operating System :: OS Independent",
"Programming Language :: Python :: 3",
"Programming Language :: Python :: 3.6",
"Programming Language :: Python :: 3.7",
"Programming Language :: Python :: 3.8",
"Topic :: Scientific/Engineering :: GIS"
],
"description": "# porder: Simple CLI for Planet ordersV2 API [](https://twitter.com/intent/tweet?text=Use%20porder%20CLI%20with%20@planetlabs%20new%20ordersv2%20API&url=https://github.com/tyson-swetnam/porder)\n\n[](https://doi.org/10.5281/zenodo.5079783)\n[](https://badge.fury.io/py/porder)\n[](https://pepy.tech/project/porder/month)\n[](https://opensource.org/licenses/Apache-2.0)\n\n\n\n\n**Disclaimer: This is an unofficial tool. Is not licensed or endorsed by Planet Labs. It was created by Samapriya Roy and is owned and maintained by Tyson Swetnam**\n\n[Orders v2](https://developers.planet.com/docs/orders/) is the next iteration of Planet's API for getting Analysis Ready Data (ARD) delivered to you. Orders v2 has the capability to submit any number of images in a batch order and perform operations such as: top of atmospheric (TOA) reflectance, compression, coregistration, and supports enhanced notifications such as email and webhooks. Based on your personal license access you can use the `porder` to place orders, download orders, or chain together a sequence of operations from the Orders v2 API. The `porder` tool runs on the command line interface only. For exporting to cloud storage `porder` uses a configuration folder with `config.yml` structures.\n\nIf you use this tool to download data and find it useful please star us on GitHub (top right corner of this page).\n\nIf you publish research which used this tool, please use this citation:\n\n```\nSamapriya Roy, Tyson L. Swetnam, Isabella (Izzi) Hinks, Ryan Avery, David Shean, Anthony Lukach, & Scott Henderson. (2021, July 7).\ntyson-swetnam/porder: porder: Simple CLI for Planet ordersV2 API (Version 0.8.3). Zenodo. http://doi.org/10.5281/zenodo.5079783\n```\n\n### **[Read the Guided Docs here](https://tyson-swetnam.github.io/porder/)**\n## Table of contents\n* [Prerequisites](#prerequisites)\n* [Installing porder](#installing-porder)\n* [Windows Setup](#windows-setup)\n* [Getting started](#getting-started)\n* [porder Simple CLI for Planet ordersv2 API](#porder-simple-cli-for-planet-ordersv2-api)\n * [porder readme](#porder-readme)\n * [porder quota](#porder-quota)\n * [base64](#base64)\n * [convert to geojson](#convert-to-geojson)\n * [simplify](#simplify)\n * [idlist](#idlist)\n * [difflist](#difflist)\n * [idsplit](#idsplit)\n * [idcheck](#idcheck)\n * [bundles](#bundles)\n * [order](#order)\n * [reorder](#reorder)\n * [cancel](#cancel)\n * [orderstate list](#orderstate-list)\n * [ordersize](#ordersize)\n * [stats](#stats)\n * [download](#download)\n * [multipart download](#multipart-download)\n * [multiprocessing download](#multiprocessing-download)\n\n## Prerequisites\n\nYou must have native python & pip installed. You can test this by going to the terminal (or windows command prompt) and trying.\n\n```python --version``` and then ```pip list```\n\nIf you have no errors and you have Python `3.6+` or higher you should be good to go.\n\nWe also recommend installation within virtual environment. If you use [Conda](https://docs.conda.io/en/latest/)\n\n```\n$ conda create -n planet_orders python\n$ conda activate planet_orders\n```\n\n**The `porder` tool is dependent on `shapely` and `fiona` which depend on GDAL**\n\n[QGIS](https://qgis.org/en/site/) is a useful open-source GIS platform which includes all of the major required dependencies for running `porder`. Installation of QGIS will ensure all `porder` requirements are met.\n\n### Linux\n\nInstalling Python GDAL in Ubuntu\n\n```\n$ sudo add-apt-repository ppa:ubuntugis/ppa && sudo apt-get update\n$ sudo apt-get install gdal-bin libcurl4-openssl-dev libssl-dev python3-gdal\n```\n\n### Windows\n\nWe also recommend using [Windows Subsystem for Linux 2](https://docs.microsoft.com/en-us/windows/wsl/install-win10) and following the linux instructions.\n\nFor Windows this [guide](https://webcache.googleusercontent.com/search?q=cache:UZWc-pnCgwsJ:https://sandbox.idre.ucla.edu/sandbox/tutorials/installing-gdal-for-windows+&cd=4&hl=en&ct=clnk&gl=us) from UCLA is useful.\n\n\n### MacOS X\n\n[KyngChaos](https://www.kyngchaos.com/software/frameworks/) maintains a MacOS X installation for GDAL\n\nInstall GDAL using [brew]\n\nInstall brew:\n\n```\n/usr/bin/ruby -e \"$(curl -fsSL https://raw.githubusercontent.com/Homebrew/install/master/install)\"\n```\n\nInstall GDAL:\n```\n% brew install gdal --HEAD\n% brew install gdal\n% gdal-config --version\n```\n\nInstall GDAL Python binding:\n\n```\n% pip3 install \u00e2\u20ac\u201d-upgrade pip\n% pip3 install numpy\n% python3 -c \u00e2\u20ac\u02dcimport gdal; print(gdal.VersionInfo())\u00e2\u20ac\u2122\n```\n\n### Docker\n\nYou can also run `porder` with [Docker](https://hub.docker.com/r/tswetnam/porder)\n\n```\n$ docker pull tswetnam/porder:latest\n```\n\nIf you haven't run `planet init` to create your token, do so first. Make sure to run docker with the volume flag mounted back to your home `${HOME}` or current working directory `${PWD}`:\n\n```\n$ docker run -it --rm -v ${HOME}:/root tswetnam/porder:latest planet init\n```\n\ncheck if you now have a private `.planet.json` file in your home or current working directory.\n\nRun `porder` as a test:\n\n```\n$ docker run -it --rm -v ${HOME}:/root tswetnam/porder:latest porder quota\n```\n\nThis should return your user information and the remaining available km of data:\n\n```\nSubscription ID: XXXXX\nPlan ID: XXXXX\nAllocation Name: your@email.address\nAllocation active from: YEAR-MM-DD\nQuota Enabled: True\nTotal Quota in SqKm: 10000\nTotal Quota used: 0.0\nRemaining Quota in SqKm: 10000.0\n```\n\n## Installing porder\n\nOnce you have the dependency libraries configured you're ready to install\n\nFrom `pip`:\n\n```pip install porder```\n\nFor linux it might help to specify the pip type and use `--user`\n\n```\npip3 install porder --user\n```\n\nFrom GitHub `source`:\n\n```\ngit clone https://github.com/tyson-swetnam/porder.git\ncd porder\npython setup.py install\n```\n\nType `porder -h` to view the help\n\n## Windows Setup\n\nShapely and a few other libraries are notoriously difficult to install on windows machines so follow the steps mentioned here **before installing porder**. You can download and install shapely and other libraries from the [Unofficial Wheel files from here](https://www.lfd.uci.edu/~gohlke/pythonlibs) download depending on the python version you have. **Do this only once you have install GDAL**. I would recommend the steps mentioned above to get the GDAL properly installed. However I am including instructions to using a precompiled version of GDAL similar to the other libraries on windows. You can test to see if you have gdal by simply running\n\n```gdalinfo```\n\nin your command prompt. If you get a read out and not an error message you are good to go. If you don't have gdal try Option 1,2 or 3 in that order and that will install gdal along with the other libraries\n\n#### Option 1:\nStarting from porder v0.4.5 onwards:\n\nSimply run ```porder -h``` after installation. This should go fetch the extra libraries you need and install them. Once installation is complete, the porder help page will show up. This should save you from the few steps below.\n\n#### Option 2:\nIf this does not work or you get an unexpected error try the following commands. You can also use these commands if you simply want to update these libraries.\n\n```\npipwin refresh\npipwin install gdal\npipwin install pyproj\npipwin install shapely\npipwin install fiona\npipwin install geopandas\n```\n\n#### Option 3\n\nFor windows first thing you need to figure out is your Python version and whether it is 32 bit or 64 bit. You can do this by going to your command prompt and typing python.\n\n\n\nFor my windows machine, I have both 32-bit python 2.7.16 and 64-bit Python 3.6.6. You can get the python version at the beginning of the highlighted lines and the 32 or 64 bit within the Intel or AMD64 within the square brackets. Your default python is the one you get by just typing python in the command line. Then download the following packages based on the information we collect about our python type in the earlier step. We use unofficial binaries to install these. This step is only needed if you are on a windows machine if you are using a setup manager like anaconda you **might** be able to avoid this setup completely\n\nAt this stage **if you were unable to install gdal then download the gdal binaries first**, install that before everything else\n\ngdal: [https://www.lfd.uci.edu/~gohlke/pythonlibs/#gdal](https://www.lfd.uci.edu/~gohlke/pythonlibs/#gdal)\n\nThen follow along the following libraries\n* pyproj: [https://www.lfd.uci.edu/~gohlke/pythonlibs/#pyproj](https://www.lfd.uci.edu/~gohlke/pythonlibs/#pyproj)\n* shapely: [https://www.lfd.uci.edu/~gohlke/pythonlibs/#shapely](https://www.lfd.uci.edu/~gohlke/pythonlibs/#shapely)\n* fiona: [https://www.lfd.uci.edu/~gohlke/pythonlibs/#fiona](https://www.lfd.uci.edu/~gohlke/pythonlibs/#fiona)\n* geopandas: [https://www.lfd.uci.edu/~gohlke/pythonlibs/#geopandas](https://www.lfd.uci.edu/~gohlke/pythonlibs/#geopandas)\n\nTo choose the version that is correct for you use the python information you collected earlier\nFor example for my python 3.6.6 and AMD 64 if I was installing shapely I would choose the following, here 36 means python 3.6 and amd64 refers to the 64bit we were talking about.\n\n```Shapely\u00e2\u20ac\u20181.6.4.post2\u00e2\u20ac\u2018cp36\u00e2\u20ac\u2018cp36m\u00e2\u20ac\u2018win_amd64.whl```\n\nYou will get a wheel file or a file ending with .whl. You can now simply browse to the folder or migrate to it in your command prompt. Once there if I am installing for my python 3.6 the command was. At this point we will make use of our trusted package installer that comes with python called pip. Note the choice of pip or pip3 depends on your python version usually you can get the pip to use with your python by typing\n\n\n```pip3 -V```\n\nyou get a readout like this\n\n```pip 18.1 from c:\\python3\\lib\\site-packages\\pip (python 3.6)```\n\nif you have pip just replace that with ```pip -V```\n\nThen simply install the wheel files you downloaded using the following setup\n\n```\npip3 install full path to Shapely\u00e2\u20ac\u20181.6.4.post2\u00e2\u20ac\u2018cp36\u00e2\u20ac\u2018cp36m\u00e2\u20ac\u2018win_amd64.whl\n\nin my case that would be\n\npip3 install \"C:\\Users\\samapriya\\Downloads\\Shapely\u00e2\u20ac\u20181.6.4.post2\u00e2\u20ac\u2018cp36\u00e2\u20ac\u2018cp36m\u00e2\u20ac\u2018win_amd64.whl\"\n```\n\nOr you can use [anaconda to install](https://conda-forge.github.io/). Again, both of these options are mentioned on [Shapely\u00e2\u20ac\u2122s Official PyPI page](https://pypi.org/project/Shapely/).\n\n## Getting started\n\nMake sure you initialized planet client by typing ```planet init```. As usual, to print help:\n\n\n\nTo obtain help for a specific functionality, simply call it with _help_ switch, e.g.: `porder idlist -h`. If you didn't install porder, then you can run it just by going to *porder* directory and running `python porder.py [arguments go here]`\n\n## porder Simple CLI for Planet ordersv2 API\nThe tool is designed to simplify using the ordersv2 API and allows the user to chain together tools and operations for multiple item and asset types and perform these operations and download the assets locally.\n\n### porder readme\nNow open the readme webpage in your browser using\n\n```\nporder readme\n```\n\n### porder quota\nJust a simple tool to print your planet subscription quota quickly.\n\n\n\n### base64\nThis does exactly as it sounds, it encodes your credential files to base64 for use with gcs.\n\n\n\n### convert to geojson\nThis tool allows you to convert from a folder with multiple shapefiles or kml files to a folder with geojson that can then be used with the tool. It makes use of geopandas and reprojects your shapefile to make it compatible while passing onto the API for search and download. KML conversions are handled seperately.\n\n\n\n### simplify\nThis reduces the number of vertices for a multi vertex and complex GeoJSON. Extremely high vertex count (over 500) seem to fail and hence this tool allows you to export a new geojson with reduced vertices. It uses an implementation of the Visvalingam-Wyatt line simplification algorithm. This tool does work with and without Fiona, but Fiona installation is recommended.\n\n\n\n### idlist\nCreate an idlist for your geometry based on some basic filters,including geometry, start and end date and cloud cover. If no cloud cover is specified everything form 0 to 100% cloud cover is included. For now the tool can handle geojson,json and kml files. The output is a csv file with ids. The tool also allows you to make sure you get percentage overlap, when selecting image, for clip operations adjust it accordingly (usally --ovp 1 for orders not to fail during clip). The tool now also prints estimated area in Square kilometes for the download and estimated area if you clipped your area with the geometry you are searching (just estimates). You can now pass multiple assetswith the idlist tool pass assets as analytic_sr,udm2 for example to get items with both these assets ``` --asset analytic_sr,udm2.\n\n**I have changed the setup to now do the following two things**\n\n* The number option is optional, so it can look for all images in the time range, but be careful if the area is too large, _use at own risk_. A better option is to supply the number.\n\n* It is possible to often forget about the different asset types, so you can now not pass an item and the script will return every possible type of asset for each item type depending on the bundle.\n\n\n\nA simple setup would be\n\n\nTo run an experiment to add additional filter, you can now pass an additional string or range filter or both flag for string and range filters, a setup would be. The additional filters are optional\n\n```\nporder idlist --input \"Path to geojson file\" --start \"YYYY-MM-DD\" --end \"YYYY-MM-DD\" --item \"PSScene4Band\" --asset \"analytic\" --outfile \"Path to idlist.csv\" --filters range:clear_percent:55:100 --number 20\n\nporder idlist --input \"Path to geojson file\" --start \"YYYY-MM-DD\" --end \"YYYY-MM-DD\" --item \"PSScene4Band\" --asset \"analytic\" --outfile \"Path to idlist.csv\" --filters string:satellite_id:\"1003,1006,1012,1020,1038\" --number 20\n\nporder idlist --input \"Path to geojson file\" --start \"YYYY-MM-DD\" --end \"YYYY-MM-DD\" --item \"PSScene4Band\" --asset \"analytic\" --outfile \"Path to idlist.csv\" --filters string:satellite_id:\"1003,1006,1012,1020,1038\" range:clear_percent:55:100 --number 20\n```\n\nThe idlist tool can now use a multipolygon and iteratively look for scenes.\n\n# Getting an idlist\n\nCreate an idlist for your geometry based on some basic filters,including geometry, start and end date and cloud cover. If no cloud cover is specified everything form 0 to 100% cloud cover is included. For now the tool can handle geojson,json and kml files. The output is a csv file with ids. The tool also allows you to make sure you get percentage overlap, when selecting image, for clip operations adjust it accordingly (usally --ovp 1 for orders not to fail during clip). The tool now also prints estimated area in Square kilometes for the download and estimated area if you clipped your area with the geometry you are searching (just estimates).\n\n**I have changed the setup to now do the following two things**\n\n* The number option is optional, so it can look for all images in the time range, but be careful if the area is too large, _use at own risk_. A better option is to supply the number.\n\n* It is possible to often forget about the different asset types, so you can now not pass an item and the script will return every possible type of asset for each item type depending on the bundle.\n\n\n\nA simple setup would be\n\n\nTo run an experiment to add additional filter, you can now pass an additional string or range filter or both flag for string and range filters, a setup would be. The additional filters are optional\n\n\n\n```\nporder idlist --input \"Path to geojson file\" --start \"YYYY-MM-DD\" --end \"YYYY-MM-DD\" --item \"PSScene4Band\" --asset \"analytic\" --outfile \"Path to idlist.csv\" --filters range:clear_percent:55:100 --number 20\n\nporder idlist --input \"Path to geojson file\" --start \"YYYY-MM-DD\" --end \"YYYY-MM-DD\" --item \"PSScene4Band\" --asset \"analytic\" --outfile \"Path to idlist.csv\" --filters string:satellite_id:\"1003,1006,1012,1020,1038\" --number 20\n\nporder idlist --input \"Path to geojson file\" --start \"YYYY-MM-DD\" --end \"YYYY-MM-DD\" --item \"PSScene4Band\" --asset \"analytic\" --outfile \"Path to idlist.csv\" --filters string:satellite_id:\"1003,1006,1012,1020,1038\" range:clear_percent:55:100 --number 20\n```\n\n\n\nThe search tool now allows the user to pass Hours , Minutes and seconds and utilizes the local timezone on the users computer to search. This including the format HH:MM:SS seperated from yyyy-mm-dd by T. An example would be the following, while noting that passing time is purely optional and you can still search by simply passing YYYY-MM-DD.\n\n```\nporder idlist --input \"Path to geojson file\" --start \"yyyy-mm-ddTHH:MM:SS\" --end \"yyyy-mm-ddTHH:MM:SS\" --item \"PSScene4Band\" --asset \"analytic\" --outfile \"Path to idlist.csv\" --filters range:clear_percent:55:100 --number 20\n\nporder idlist --input \"Path to geojson file\" --start \"2021-01-01T14:12:10\" --end \"2021-03-01T16:20:20\" --item \"PSScene4Band\" --asset \"analytic\" --outfile \"Path to idlist.csv\" --number 20\n```\n\nThe idlist tool can now use a multipolygon and iteratively look for scenes.\n\n\n### difflist\nIt is possible you already downloaded some images or metadata files, and your you want a difference idlist to create orders for only assets and item types you do not have. It takes in your local folder path, type image or metadata and some basic filters,including geometry, start and end date and cloud cover. If no cloud cover is specified everything form 0 to 100% cloud cover is included. For now the tool can handle geojson,json and kml files. The output is a csv file with ids.\n\n\n\nA simple setup would be\n\n\nor without the cloud filter\n\n\n\n### idsplit\nThis allows you to split your idlist into small csv files incase you wanted to created batches of orders.\n\n\n\nA simple setup would be\n\n\n### idcheck\nIt is possible for you to modify the idlist, add or remove ids. Once done, this tool allows you to estimate the total area of images and area that intersect with your geometry or area if clipped.\n\n\n\nA simple setup would be\n\n\n### bundles\nOrdering using ordersv2 uses the concept of bundles. A bundle is a combination of multiple assets for an item that come together and are delivered as part of the overall fulfillment of the order. For example an analytic asset for PSScene4Band is a single tif file, however the analytic bundle for PSScene4Band includes analytic tiff file, the analytic_xml metadata and the udm data mask file as part of the bundle. You can find more information about [bundles here](https://developers.planet.com/docs/orders/product-bundles-reference/). Thus the concept of bundles bring together single function to order and download multiple related assets. Since the list of bundles is long, this tool simply allows you to get every bundle type based on item type. The setup is simple\n\n\n\nA simple setup would be\n\n```\nporder bundles --item \"PSScene4Band\"\n```\n\n### order\nThis tool allows you to actually place the order using the idlist that you created earlier. the ```--op``` argument allows you to take operations, delivery and notifications in a sequence for example ```--op toar clip email``` performs Top of Atmospheric reflectance, followed by clipping to your geometry and send you an email notification once the order has completed, failed or had any any change of status. An important changes is the concept of passing bundles instead of using assets. Bundles are predefined meaning all assets in a bundle are not available for an item your attempt at downloading that attempt will fail.\n\nFor example if an item id '20181227_125554_0f4c' does not have surface reflectance asset type. So if you try to download this using bundle type analytic_sr_udm2 it will not work, similary if you order an item where a specific operation cannot be performed for example if you order visual and then try to do bandmath with four bands. These examples and more are where **fallback bundles** come in handy. Think of this as providing a list of bundles to keep trying if one bundle type fails. The priority goes left to right. You can provide comma seperated fallback bundles for example as\n\n```analytic_sr_udm2,analytic``` instead of ```analytic_sr_udm2``` to avoid certain items from failing to download.\n\nThe list of operations for the ```--op``` are below and ** the order of these operations is important**\n\n\n\n\nop | description |\n------------------|-------------------------------------------------------------------------------|\nclip | Clip imagery can handle single and multi polygon verify or create geojson.io\ntoar | Top of Atmosphere Reflectance imagery generated for imagery\nharmonize| Harmonize Dove R (instrument type PS2.SD) data to classic dove (instrument type PS)\ncomposite | Composite number of images in a given order\nzip | Zip bundles together and creates downloads (each asset has a single bundle so multiple zip files)\nzipall | Create a single zip file containing all assets\ncompression | Use image compression\nprojection | Reproject before downloaing image\naws | Option called to specify delivery to AWS\nazure | Option called to specify delivery to AZURE\ngcs | Option called to specify delivery to GCS\nemail | Email notification to your planet registered email\nanchor | Anchor image id for coregistration\nformat | Delivery format choose from COG/PL_NITF to use for the format tool\ngee | provide gee-project,gee-collection\n\n\n\n\nYou can now add some predefined indices for PlanetScope 4 band items with a maximum of 5 indices for a single setup . This is experimental. The list of indices include\n\n\n\nIndex | Source |\n------------------|-------------------------------------------------------------------------------|\nSimple ratio (SR) | [Jordan 1969](https://esajournals.onlinelibrary.wiley.com/doi/abs/10.2307/1936256)\nNormalized Difference Vegetation Index (NDVI) | [Rouse et al 1973](https://ntrs.nasa.gov/search.jsp?R=19740022614)\nGreen Normalized Difference Index (GNDVI) | [Gitelson et al 1996](https://www.sciencedirect.com/science/article/abs/pii/S0034425796000727)\nBlue Normalized Difference Vegetation Index (BNDVI) | [Wang et al 2007](https://www.sciencedirect.com/science/article/pii/S1672630807600274)\nTriangular Vegetation Index (TVI) | [Broge and Leblanc 2000](https://www.sciencedirect.com/science/article/abs/pii/S0034425700001978)\nTransformed Vegetation Index (TVI) | [Deering et al 1975](https://www.scopus.com/record/display.uri?eid=2-s2.0-0016674266&origin=inward&txGid=d7c7bce489d9408e26cd62b928e93b38)\nOptimized Soil Adjusted Vegetation Index (OSAVI) | [Rondeaux et al 1996](https://www.sciencedirect.com/science/article/abs/pii/0034425795001867)\nEnhanced Vegetation Index (EVI2) | [Jian et al 2008](https://www.sciencedirect.com/science/article/abs/pii/S0034425708001971)\nNormalized Difference Water Index (NDWI) | [McFeeters 1996](https://www.tandfonline.com/doi/abs/10.1080/01431169608948714)\nModified Soil-adjusted Vegetation Index v2 (MSAVI2) | [Qi 1994](https://www.sciencedirect.com/science/article/abs/pii/0034425794901341?via%3Dihub)\n\n\n\n\n\nA simple setup with image clip with email notification would be\n\n\n\nThe same setup with delivery of each image, its metadata as a zip file would be. Note how we only added zip to the op list\n\n\n\nA simple setup with Top of Atmosphere reflectance and a few indices along with email notification would be\n\n\n\nA simple setup with **Google Earth Engine Delivery** and a few indices along with email notification would be\n\n\n\n### reorder\nThis tool allows you to reorder an existing order with the same item ids and tools. This is trying to look into the overall structures of existing orders and maybe useful to reorder if an order fails for example.\n\n```\nusage: porder reorder [-h] --url URL [--notification NOTIFICATION]\n\noptional arguments:\n -h, --help show this help message and exit\n\nRequired named arguments.:\n --url URL Order url to be ordered\n\nOptional named arguments:\n --notification NOTIFICATION\n Use \"email\" to get an email notification\n```\n\n### cancel\nYou can cancel a queued order or cancel all queued orders, before the status changes to running. Simply put you can cancel a specific order before it starts running or cancel all of your queued orders.\n\n```\nusage: porder cancel [-h] [--id ID]\n\noptional arguments:\n -h, --help show this help message and exit\n --id ID order id you want to cancel use \"all\" to cancel all\n```\n\nSetup to cancel an order\n\n```\nporder cancel --id \"orderid goes here\"\n```\n\nto cancel all queued orders\n\n```\nporder cancel --id \"all\"\n```\n\n### orderstate list\nThis tool allows you to get the list of orders based on the states and based on the start and end dates of orders. For example if you want to find out all orders that failed within the week you can use this tool to check that.\n\n```\nusage: porder ostate [-h] [--state STATE] [--start START] [--end END]\n [--limit LIMIT]\n\noptional arguments:\n -h, --help show this help message and exit\n --state STATE choose state between queued| running | success | failed |\n partial\n --start START start date in format YYYY-MM-DD\n --end END end date in format YYYY-MM-DD\n\nOptional named arguments:\n --limit LIMIT Limit the maximum table size\n```\n\nThe setup to check failed orders would be for example the following, You can place a limit on the number of orders to get by using --limit\n\n```\nporder ostate --state failed --start 2019-11-01 --end 2019-11-20\n```\n\n\n### ordersize\nThe tool now allows you to estimate the total download size for a specific order.\n\n\n\nAn example setup look like the following\n\n\n\n\n\n\n\n### stats\nThe tool allows you to check on number of running and queued orders for both organization and user level. Using this is simple\n\n```\nporder stats\n```\n\noutput should look like this:\n\n```\nChecking on all running orders...\nTotal queued order for organization: 0\nTotal running orders for organization: 1\n\nTotal queued orders for user: 0\nTotal running orders for user: 0\n```\n\n### download\nThe allows you to download the files in your order, to a local folder. It uses the order url generated using the orders tool to access and download the files.\n\n\n\n### multipart download\nThe allows you to multipart download the files in your order, this uses a multiprocessing downloader to quickly download your files to a local folder. It uses the order url generated using the orders tool to access and download the files.\n\n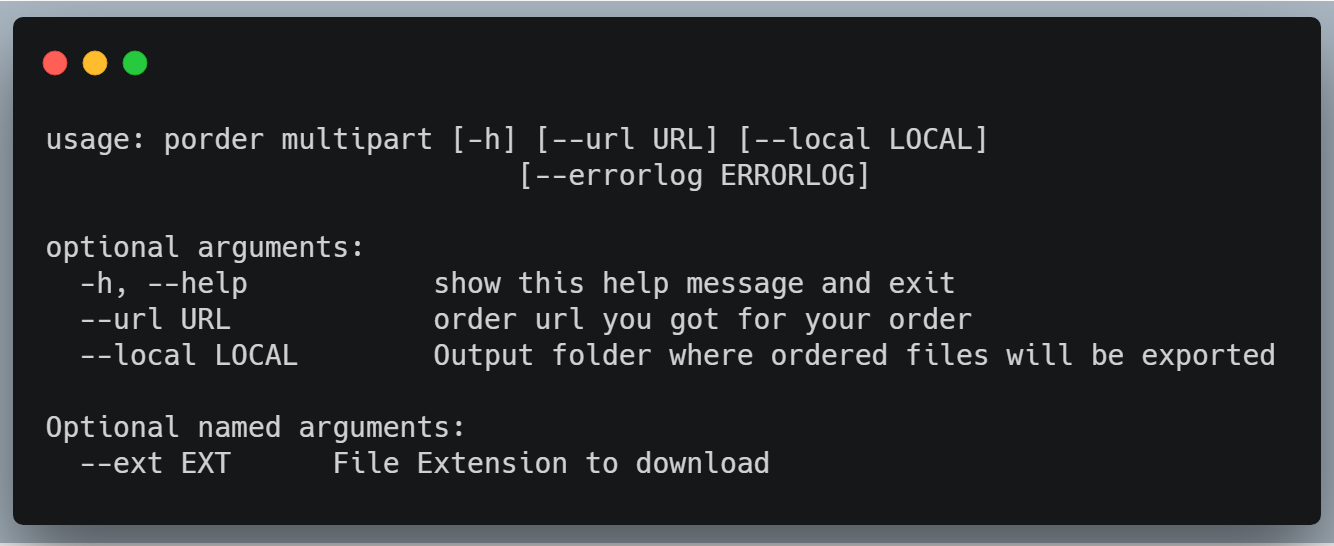\n\n### multiprocessing download\nThe uses the multiprocessing library to quickly download your files to a local folder. It uses the order url generated using the orders tool to access and download the files and includes an expotential rate limiting function to handle too many requests. To save on time it uses an extension filter so for example if you are using the zip operation you can use \".zip\" and if you are downloading only images, udm and xml you can use \".tif\" or \".xml\" accordingly. For python 3.4 or higher, this switches to using an true async downloader instead of using multiprocessing.\n\n\n\nA simple setup would be\n\n\n\n## Changelog\n\n### v0.8.5\n- Fixed minor issue with import error checking for GDAL\n\n### v0.8.4\n- Resolved [Issue 49](https://github.com/tyson-swetnam/porder/issues/49)\n- Download now contains manifest.json for cross checking delivery\n\n### v0.8.3\n- Fixed bundle parsing\n- Updated based bundles\n\n### v0.8.2\n- [Pull request 48](https://github.com/tyson-swetnam/porder/pull/48)\n- fixes typos and equations for bandmath and includes additional reference information\n- increased pipwin check time to 60+ days\n- added better version check and handling\n- updated license date and minor fixes\n\n### v0.8.1\n- Search function can now parse date and time. Enhancement from [Issue 47](https://github.com/tyson-swetnam/porder/issues/47)\n- Updated readme site to include search examples\n- Stability test across python3.7 to 3.9 and for all os types\n- pipwin checks cache every one month\n\n### v0.8.0\n- Added gee-integration example\n- Updated readme site to include examples\n\n### v0.7.9\n- Added gee-integration tool to order\n- General improvements\n\n### v0.7.8\n- Added support for multipolygon search and clip.\n- Added coregistration and format tools to order\n- Removed persistent version print\n- Overall cleanup and general Improvements\n\n### v0.7.7\n- Removed dependency on pendulum and general cleanup.\n\n### v0.7.6\n- Now use multiple assets with the idlist tool pass assets as analytic_sr,udm2 for example to get items with both these assets.\n- Updated readme.\n\n### v0.7.5\n- Fixed pipwin python path for installer.\n- idlist tool now only returns standard and excludes beta and test quality.\n\n### v0.7.4\n- added smart check on partially completed order for reordering.\n- completed orders can be reordered as well\n\n### v0.7.3\n- Now constantly checks for updated version incase your porder version is not updated.\n- Added a reorder tool for users to reorder an exiting order or failed order.\n\n### v0.7.1\n- ID check tool now works with/without geometry, pass an idlist, and item and asset type to check.\n- Order size tool is optimized for speed.\n- pipwin tool uploaded to v0.5.0 to handle windows packages.\n- Overall general improvements.\n\n### v0.7.0\n- Now estimates total download size before downloading.\n- Fixed issue with downloading single archive zip files.\n\n### v0.6.9\n- Updated readme to do bulk conversion from Shapefile and KML to geojson.\n- Fixed issues with bundles read and update.\n\n### v0.6.8\n- Fixed issues with direct usage of kml to get idlist.\n- Combined convert tool to convert folders with shapefiles and kml to geojsons.\n\n### v0.6.6-v0.6.7\n- Fixed downloader for pipwin for [release >= 0.4.8](https://github.com/lepisma/pipwin/pull/41)\n- Improved overall package installation for windows\n- Check pipwin import version to get release 0.4.9\n\n### v0.6.5\n- Added bundles check function to get latest bundles from [developers page](https://developers.planet.com/docs/orders/product-bundles-reference/).\n\n### v0.6.4\n- [Pull request](https://github.com/lepisma/pipwin/pull/38) fixed issue with pipwin installation.\n\n### v0.6.2\n- Fixed issue with werkzeug and pipwin implementation.\n- Changed default overlap to 0.01\n- Fixed issue with YAML loader implementation.\n- General improvements.\n\n### v0.6.1\n- Added cancel order and bulk cancel orders tools\n\n### v0.6.0\n- Fixed base64 encoding for GCS credentials for python 3.\n- Re-release of python 3 only supported version. Use upto version 0.5.7 only for Python 2.\n\n### v0.5.9\n- No more deperecation or future warnings from pyproj [Issue 40](https://github.com/samapriya/porder/issues/40)\n- `porder search` is faster\n- Python 2.7 will reach the end of its life on January 1st, 2020. No more python 2 support from v0.5.9\n\n### v0.5.8\n- Handles python version while installing pipwin\n- Now open readme page in browser using **porder readme**\n\n### v0.5.7\n- Fixed arg readout if no argument is passed to CLI. [Issue 39](https://github.com/samapriya/porder/issues/39).\n- Updated requirements to include DateTimeRange\n- Fixed issue with GDAL~=3 requirement for fiona 1.8.11 release.\n\n### v0.5.6\n- Merged [pull request 38](https://github.com/samapriya/porder/pull/38) to allow for nested delivery of zip files to cloud storage.\n- Added an order state list tool.\n\n### v0.5.5\n- Better file check for skipping download requests.\n- Improvements to multiprocessing and async downloader.\n- General improvements to stability and performance.\n\n### v0.5.4\n- Updated bundles.json.\n- Merged pull request to [update bundles](https://github.com/samapriya/porder/pull/36).\n\n### v0.5.3\n- Updated order status.\n- Check existing files before attempting redirect url and download.\n- Overall optimization for faster check and updated readme for fallback bundles.\n\n### v0.5.2\n- Added harmonization tool to harmonize PS2.SD to PS2.\n- Improvements and error handling to quota tool\n- Merged [pull request 35](https://github.com/samapriya/porder/pull/35) to keep download progress via enumerate.\n\n### v0.5.1\n- Added utf-8 encoding for shapefile to geojson conversion\n- Merged [pull request 34](https://github.com/samapriya/porder/pull/34) to refresh url once expired.\n\n### v0.4.9\n- Fixed issue with gdal import for pipwin windows.\n- Fixed import issue with stats endpoint.\n\n### v0.4.8\n- Replaced concurrency check with stats endpoint to get queued and running orders.\n- Change pipwin cache refresh time to two weeks.\n\n### v0.4.7\n- Fixed issue with queuing state for orders and downloads.\n\n### v0.4.6\n- Handles refreshing pipwin cache and better error handling\n- Fixed issue with downloading unique manifest ID for zip files.\n- Updated ReadMe with improved documentation.\n\n### v0.4.5\n- Handles installation of windows specific libraries using [pipwin](https://pypi.org/project/pipwin/).\n- General improvements\n\n### v0.4.4\n- Manifest files for each asset is now written in format ItemID_manifest.json to avoid skipping manifest.json common file name.\n- Simple and multipart downloader now show number of items remaining during the download.\n- General improvements, bundles tool now prints Bundles:Name followed by assets included in the bundle\n\n### v0.4.3\n- Fixed issues with setup.py and pyproj version.\n- Improved ReadMe instructions.\n\n### v0.4.2\n- Added geometry check functionality to multipolygon with shapely self intersection [Issue 30](https://github.com/samapriya/porder/issues/30).\n- For multipolygons this also performs a vertex count check and simplifies polygon to fit under 500 vertices.\n- General improvements\n\n### v0.4.1\n- Fixed issue with shapely self intersection using buffer(0).\n- General improvements\n\n### v0.4.0\n- Fixed issue with placing reprojection request.\n- Downloader can now download partial as well as completely successful orders.\n- Added retry method for rate limit during downloading\n- General improvements\n\n### v0.3.9\n- Removed deprecated bundles from bundles list.\n- Improved parameter description\n\n### v0.3.7\n- Added capability to pass subscription id when submitting order.\n\n### v0.3.6\n- Replaced asset in order tool with bundles.\n- Created a new bundles tool to generate bundle list for an item type\n- Improvements to the idlist tool now prints output as it makes progress.\n\n### v0.3.5\n- Better integration for quota tool\n- Updates information while waiting for idlist\n- Updated requirements\n\n### v0.3.4\n- Added async downloader for python 3.4\n- Checks for existing files before spawning processes\n- Better handling of multiprocessing output\n- Added a quick version tool\n\n### v0.3.3\n- Fixed issue with order name when no ops are used.\n- Used file basename for splitting the idlist.\n\n### v0.3.2\n- idlist tool can no use a multipolygon and iteratively look for scenes\n- Orders clip tool can now handle multipolygon clip\n- Added new tool zipall to handle single archive download in format ordername_date.zip\n\n### v0.3.1\n- Can now support an additional string and range filter\n- Check total area and clip area estimates from any idlist using idcheck.\n- General improvements to the tool.\n\n### v0.3.0\n- Enhances idlist to execute faster search and return using Planet CLI\n- Included better error handling while placing order.\n\n### v0.2.8\n- Added tool to convert folder with shapefiles to GeoJSONs\n\n### v0.2.7\n- Improved overlap calculations for larger geometries\n- Added a geometry simplification tool to reduce number of vertices\n\n### v0.2.6\n- Skysat area are calculated using EPSG:3857 to resolve metadata EPSG issue\n- General improvements\n\n### v0.2.5\n- Fixed issue with area calculation estimates\n- General improvements\n\n### v0.2.4\n- Now functions without limit on the number of assets in the idlist\n- Parses possible asset types if only item type is supplied for idlist\n\n### v0.2.3\n- Now estimates area before and after clip when you run idlist\n- General improvements\n\n### v0.2.1\n- Now exports only csv idlist\n- Fixed count with concurrency check\n\n### v0.2.0\n- Fixed pysmartdl install issues\n- Added concurrent orders check\n- version and os resolve for shapely\n\n### v0.1.9\n- Added msavi\n- Fixed issues with GeoJSON read\n\n### v0.1.8\n- Fixed issues with empty JSON append\n- General improvements to the tool\n\n### v0.1.7\n- Added band math indices for PlanetScope item\n- Fixed issues with retry for downloader\n- General improvements to the tool\n\n### v0.1.6\n- Made fixes to have python 3.X compatability\n\n### v0.1.5\n- General improvements and bug fixes\n\n### v0.1.4\n- Fixed issue with Python 3 CSV write compatability\n- Fixed issues with Shapely instance issue\n\n### v0.1.3\n- Fixed issue with clipboard access in headless setup\n\n### v0.1.2\n- Fixed issue and extension for multiprocessing downloader\n- Overall general improvements to the tool\n\n### v0.1.0\n- Fixed issue and improved idlist and sort\n- Fixed issue with clip tool\n- Overall general improvements to the tool\n\n### v0.0.8\n- Improvements to operations in order tool\n- Now supports export to gcs/azure/aws along with kernel, projection and compression\n- base64 encoding tool for encoding gcs credentials\n- Overall general improvements to the tool\n\n### v0.0.7\n- Now allows for all downloads or download using extension\n- Polling for order to complete and automatically download\n- General improvements\n\n### v0.0.6\n- Merged contribution by David Shean\n- Fixed issues with op equals None\n- Fixed issues with relative import\n- Improved Py3 compatability\n- General improvements\n\n### v0.0.5\n- Added exponential backoff for pydl\n- Fixed issues with dependency\n- General overall improvements\n\n### v0.0.4\n- Created strict geoinstersection to avoid orders to fail\n- Improvements to overlap function\n- General overall improvements\n\n### v0.0.3\n- Added overlap function to idlist\n- Added multiprocessing downloader with rate limit and extension filter\n- General overall improvements\n\n### v0.0.2\n- Fixed issues with import modules\n\n\n",
"description_content_type": "text/markdown",
"docs_url": null,
"download_url": "",
"downloads": {
"last_day": -1,
"last_month": -1,
"last_week": -1
},
"home_page": "https://github.com/samapriya/porder",
"keywords": "",
"license": "Apache 2.0",
"maintainer": "",
"maintainer_email": "",
"name": "porder",
"package_url": "https://pypi.org/project/porder/",
"platform": "",
"project_url": "https://pypi.org/project/porder/",
"project_urls": {
"Homepage": "https://github.com/samapriya/porder"
},
"release_url": "https://pypi.org/project/porder/0.8.6/",
"requires_dist": [
"requests (>=2.21.1)",
"planet (>=1.4.5)",
"retrying (>=1.3.3)",
"progressbar2 (>=3.38.0)",
"visvalingamwyatt (>=0.1.2)",
"DateTimeRange (>=0.6.1)",
"beautifulsoup4",
"clipboard (>=0.0.4)",
"pyyaml (>=3.12)",
"prettytable (>=0.7.2)",
"pyproj (>=1.9.5.1) ; platform_system != \"Windows\"",
"shapely (>=1.6.4) ; platform_system != \"Windows\"",
"fiona (>=1.8.6) ; platform_system != \"Windows\"",
"geopandas (>=0.5.0) ; platform_system != \"Windows\"",
"pySmartDL (==1.2.5) ; python_version < \"3.4\"",
"pySmartDL (>=1.3.1) ; python_version > \"3.4\""
],
"requires_python": ">=3.4",
"summary": "Simple CLI for Planet Orders v2",
"version": "0.8.6",
"yanked": false,
"yanked_reason": null
},
"last_serial": 11260428,
"releases": {
"0.0.1": [
{
"comment_text": "",
"digests": {
"md5": "82c17222e86bbb03e4bbccb0a08b184e",
"sha256": "91040db8b9655780ce7d8f475432971cfa0079cfd04677fa46ee97b891e9ee45"
},
"downloads": -1,
"filename": "porder-0.0.1.tar.gz",
"has_sig": false,
"md5_digest": "82c17222e86bbb03e4bbccb0a08b184e",
"packagetype": "sdist",
"python_version": "source",
"requires_python": null,
"size": 16128,
"upload_time": "2018-11-14T06:05:23",
"upload_time_iso_8601": "2018-11-14T06:05:23.162784Z",
"url": "https://files.pythonhosted.org/packages/1b/e7/cb9671f389e6cc4f6f02f08924cc0efee56141ac383265934a84c6a74b60/porder-0.0.1.tar.gz",
"yanked": false,
"yanked_reason": null
}
],
"0.0.2": [
{
"comment_text": "",
"digests": {
"md5": "32e745d1fce5d0e9856107423b0a84fe",
"sha256": "7f501227716bcad643cbe92296c6316ac4c5f53872d236469a0bb7f7c7c27639"
},
"downloads": -1,
"filename": "porder-0.0.2.tar.gz",
"has_sig": false,
"md5_digest": "32e745d1fce5d0e9856107423b0a84fe",
"packagetype": "sdist",
"python_version": "source",
"requires_python": null,
"size": 16712,
"upload_time": "2018-11-30T01:59:42",
"upload_time_iso_8601": "2018-11-30T01:59:42.229266Z",
"url": "https://files.pythonhosted.org/packages/b3/37/47e121dc23dbc210db2fea56b232a9188c288a98097a5d0bcca7d481c6e4/porder-0.0.2.tar.gz",
"yanked": false,
"yanked_reason": null
}
],
"0.0.3": [
{
"comment_text": "",
"digests": {
"md5": "e38e320a124df259e78642407b75457d",
"sha256": "64421fbea8fd085269d408223856df074e9851235dd79888aef77e60491c8eba"
},
"downloads": -1,
"filename": "porder-0.0.3.tar.gz",
"has_sig": false,
"md5_digest": "e38e320a124df259e78642407b75457d",
"packagetype": "sdist",
"python_version": "source",
"requires_python": null,
"size": 20022,
"upload_time": "2018-12-18T04:47:34",
"upload_time_iso_8601": "2018-12-18T04:47:34.564519Z",
"url": "https://files.pythonhosted.org/packages/01/21/7e7f6a2d84889eec110aaa8ae641baa19d1237ed086076a5e712ed0a1001/porder-0.0.3.tar.gz",
"yanked": false,
"yanked_reason": null
}
],
"0.0.4": [
{
"comment_text": "",
"digests": {
"md5": "31c114d72ec736b4c83075b05dd60e20",
"sha256": "f7b6d2c536690ae44f2c0a7e0f7358796b4cd62334519480322f05efe76b0593"
},
"downloads": -1,
"filename": "porder-0.0.4.tar.gz",
"has_sig": false,
"md5_digest": "31c114d72ec736b4c83075b05dd60e20",
"packagetype": "sdist",
"python_version": "source",
"requires_python": null,
"size": 20162,
"upload_time": "2018-12-27T13:55:20",
"upload_time_iso_8601": "2018-12-27T13:55:20.957902Z",
"url": "https://files.pythonhosted.org/packages/b1/4a/913109574abcf60dabb67727d568aef54e0f6865e8ed9089cbbb28cde596/porder-0.0.4.tar.gz",
"yanked": false,
"yanked_reason": null
}
],
"0.0.5": [
{
"comment_text": "",
"digests": {
"md5": "9b71c39f4b9dec52d98a8dc920af0a0f",
"sha256": "97254b163bae35d4516a8d53b0d80ce2cba53768df48dc4bd39f115b1184a30f"
},
"downloads": -1,
"filename": "porder-0.0.5.tar.gz",
"has_sig": false,
"md5_digest": "9b71c39f4b9dec52d98a8dc920af0a0f",
"packagetype": "sdist",
"python_version": "source",
"requires_python": null,
"size": 20254,
"upload_time": "2019-01-03T01:46:17",
"upload_time_iso_8601": "2019-01-03T01:46:17.190158Z",
"url": "https://files.pythonhosted.org/packages/74/42/c8adcdd538670553eca5812007e65cda69b2674aed128117bce15e8c3d5c/porder-0.0.5.tar.gz",
"yanked": false,
"yanked_reason": null
}
],
"0.0.6": [
{
"comment_text": "",
"digests": {
"md5": "9273e71998804426256c5ab04235a617",
"sha256": "c7c59d24ea4c5b13c958207b262b291aebb265cbc8a7a2ecee1498fc5e2629c0"
},
"downloads": -1,
"filename": "porder-0.0.6.tar.gz",
"has_sig": false,
"md5_digest": "9273e71998804426256c5ab04235a617",
"packagetype": "sdist",
"python_version": "source",
"requires_python": null,
"size": 20824,
"upload_time": "2019-01-03T14:23:09",
"upload_time_iso_8601": "2019-01-03T14:23:09.568621Z",
"url": "https://files.pythonhosted.org/packages/83/df/86edfd53d4f885ac5f9a7a731b632a76a12553d1672ea744453d76c22e2f/porder-0.0.6.tar.gz",
"yanked": false,
"yanked_reason": null
}
],
"0.0.7": [
{
"comment_text": "",
"digests": {
"md5": "8349d2df2f65e200f4e3109a1c8bbd5c",
"sha256": "d0c2f59fdd3f6545a5b4f9336addb79ba1748516f9d1a31b8b6f07f1b7ecf55f"
},
"downloads": -1,
"filename": "porder-0.0.7.tar.gz",
"has_sig": false,
"md5_digest": "8349d2df2f65e200f4e3109a1c8bbd5c",
"packagetype": "sdist",
"python_version": "source",
"requires_python": null,
"size": 20939,
"upload_time": "2019-01-07T05:52:04",
"upload_time_iso_8601": "2019-01-07T05:52:04.469038Z",
"url": "https://files.pythonhosted.org/packages/03/5d/2e3c6cbbbcfa1fca42716402556d2fc80ac3a22514a8f3cfb2f7f0a0f395/porder-0.0.7.tar.gz",
"yanked": false,
"yanked_reason": null
}
],
"0.0.8": [
{
"comment_text": "",
"digests": {
"md5": "8afb4b88c00635c04fa352dbfe793f3e",
"sha256": "d0e0a475526c41a04e52f76c382b83fe387abf1fb8ab40d8ce5416266959842d"
},
"downloads": -1,
"filename": "porder-0.0.8.tar.gz",
"has_sig": false,
"md5_digest": "8afb4b88c00635c04fa352dbfe793f3e",
"packagetype": "sdist",
"python_version": "source",
"requires_python": null,
"size": 22444,
"upload_time": "2019-01-14T05:38:32",
"upload_time_iso_8601": "2019-01-14T05:38:32.353358Z",
"url": "https://files.pythonhosted.org/packages/33/9b/a08ba59ab25ea7f38fcbf98f9906f81c530e544865df72203515687d2377/porder-0.0.8.tar.gz",
"yanked": false,
"yanked_reason": null
}
],
"0.0.9": [
{
"comment_text": "",
"digests": {
"md5": "d731009d3d4bdaa9f6bca71697e9cafb",
"sha256": "749fba6ad88cafe73f964d49109765488998d51a06d4beac48f627a30c484170"
},
"downloads": -1,
"filename": "porder-0.0.9.tar.gz",
"has_sig": false,
"md5_digest": "d731009d3d4bdaa9f6bca71697e9cafb",
"packagetype": "sdist",
"python_version": "source",
"requires_python": null,
"size": 22447,
"upload_time": "2019-01-23T22:20:03",
"upload_time_iso_8601": "2019-01-23T22:20:03.734087Z",
"url": "https://files.pythonhosted.org/packages/e7/f8/8ad511598d7b4aeacd15543b2df3467bef98742be15885bc41e427de06f1/porder-0.0.9.tar.gz",
"yanked": false,
"yanked_reason": null
}
],
"0.1.0": [
{
"comment_text": "",
"digests": {
"md5": "02ea97c023ca0ca6ccbdf7509f3124f5",
"sha256": "ab3310b89217bcf8b907d4bf54f4066db7a7164b0335c4a021a7a4912cdd8bea"
},
"downloads": -1,
"filename": "porder-0.1.0.tar.gz",
"has_sig": false,
"md5_digest": "02ea97c023ca0ca6ccbdf7509f3124f5",
"packagetype": "sdist",
"python_version": "source",
"requires_python": null,
"size": 22527,
"upload_time": "2019-01-24T02:19:15",
"upload_time_iso_8601": "2019-01-24T02:19:15.397658Z",
"url": "https://files.pythonhosted.org/packages/33/2e/bd2cd6d8c1e6c7cbc2975ef687dce85c49d78ed0d1cb8e1f1fec1f5b1e47/porder-0.1.0.tar.gz",
"yanked": false,
"yanked_reason": null
}
],
"0.1.1": [
{
"comment_text": "",
"digests": {
"md5": "2e336ff78e61676dc23364efa8746002",
"sha256": "562c279e0f626c32eae3c0fd4730470aaaee0cf891e295530c252c4a7c8dd09b"
},
"downloads": -1,
"filename": "porder-0.1.1.tar.gz",
"has_sig": false,
"md5_digest": "2e336ff78e61676dc23364efa8746002",
"packagetype": "sdist",
"python_version": "source",
"requires_python": null,
"size": 22534,
"upload_time": "2019-01-24T20:01:22",
"upload_time_iso_8601": "2019-01-24T20:01:22.014487Z",
"url": "https://files.pythonhosted.org/packages/bc/9a/966c51ab1c979846a8c07406744b4d9b04aa5cbb5eea802425752044ed35/porder-0.1.1.tar.gz",
"yanked": false,
"yanked_reason": null
}
],
"0.1.2": [
{
"comment_text": "",
"digests": {
"md5": "0e718716aa5aa8adfb736193396fc517",
"sha256": "54e45edc92669d40d000b7b26f12a70d2c9faa4c85f0369d0e75628917474448"
},
"downloads": -1,
"filename": "porder-0.1.2.tar.gz",
"has_sig": false,
"md5_digest": "0e718716aa5aa8adfb736193396fc517",
"packagetype": "sdist",
"python_version": "source",
"requires_python": null,
"size": 22605,
"upload_time": "2019-01-25T20:13:39",
"upload_time_iso_8601": "2019-01-25T20:13:39.963845Z",
"url": "https://files.pythonhosted.org/packages/af/62/454d8445777e9ec93a3de37129a5f95745a3ba730c950a40a58352cc0017/porder-0.1.2.tar.gz",
"yanked": false,
"yanked_reason": null
}
],
"0.1.3": [
{
"comment_text": "",
"digests": {
"md5": "57338daf5623e297688120deddbdfa8b",
"sha256": "47364ceb69aaee5b55260a7a9d67aaeffbeb0cc29248a3193cc4bb73ed817ba9"
},
"downloads": -1,
"filename": "porder-0.1.3.tar.gz",
"has_sig": false,
"md5_digest": "57338daf5623e297688120deddbdfa8b",
"packagetype": "sdist",
"python_version": "source",
"requires_python": null,
"size": 22674,
"upload_time": "2019-01-28T16:17:40",
"upload_time_iso_8601": "2019-01-28T16:17:40.522473Z",
"url": "https://files.pythonhosted.org/packages/83/a9/bc187ea552f295fcbf698057423318395ace101d5879fd239284ebe63bdb/porder-0.1.3.tar.gz",
"yanked": false,
"yanked_reason": null
}
],
"0.1.4": [
{
"comment_text": "",
"digests": {
"md5": "5b593423d14e46a901a9f95ded99636b",
"sha256": "06d1fc8cf1c96ca91b44bb0f96d42be19af92c2e542d512c7eb40489191cfcc1"
},
"downloads": -1,
"filename": "porder-0.1.4.tar.gz",
"has_sig": false,
"md5_digest": "5b593423d14e46a901a9f95ded99636b",
"packagetype": "sdist",
"python_version": "source",
"requires_python": null,
"size": 22841,
"upload_time": "2019-01-29T19:57:41",
"upload_time_iso_8601": "2019-01-29T19:57:41.547128Z",
"url": "https://files.pythonhosted.org/packages/ce/6e/a6f81de1f2a29d83a6124b28bed2079be9e46ba48d75f191b87556f69b5b/porder-0.1.4.tar.gz",
"yanked": false,
"yanked_reason": null
}
],
"0.1.5": [
{
"comment_text": "",
"digests": {
"md5": "837260f1744d02203ed2f728135babf4",
"sha256": "d0d2824f5ddd57c49938dfb5599b0fdd3fdcbcf7690e8c80bbafc120c2634937"
},
"downloads": -1,
"filename": "porder-0.1.5.tar.gz",
"has_sig": false,
"md5_digest": "837260f1744d02203ed2f728135babf4",
"packagetype": "sdist",
"python_version": "source",
"requires_python": null,
"size": 22891,
"upload_time": "2019-01-30T15:53:33",
"upload_time_iso_8601": "2019-01-30T15:53:33.092544Z",
"url": "https://files.pythonhosted.org/packages/d7/77/9a2e32e4bbacca43e03e7af99695ad926fa8c04b869483a840058ca583bb/porder-0.1.5.tar.gz",
"yanked": false,
"yanked_reason": null
}
],
"0.1.6": [
{
"comment_text": "",
"digests": {
"md5": "1e15f0f56176287830963f234b4fc014",
"sha256": "b7ca4c15b0ddc20445a54f02fe840bbb51b487db139ec0158b490d6d29b19b71"
},
"downloads": -1,
"filename": "porder-0.1.6.tar.gz",
"has_sig": false,
"md5_digest": "1e15f0f56176287830963f234b4fc014",
"packagetype": "sdist",
"python_version": "source",
"requires_python": null,
"size": 22940,
"upload_time": "2019-02-07T03:44:18",
"upload_time_iso_8601": "2019-02-07T03:44:18.581861Z",
"url": "https://files.pythonhosted.org/packages/c1/f1/3a3afae33c7232c188abba3e274c9463d99b5c9e73050f46e7fb81b740d6/porder-0.1.6.tar.gz",
"yanked": false,
"yanked_reason": null
}
],
"0.1.7": [
{
"comment_text": "",
"digests": {
"md5": "dec81dc6a3457828bf0bf6a9ee814de0",
"sha256": "2245eef5dec022ca6e529334c5ead1778d6294fb47056ef19bf05194681ccb83"
},
"downloads": -1,
"filename": "porder-0.1.7.tar.gz",
"has_sig": false,
"md5_digest": "dec81dc6a3457828bf0bf6a9ee814de0",
"packagetype": "sdist",
"python_version": "source",
"requires_python": null,
"size": 25508,
"upload_time": "2019-02-17T15:08:45",
"upload_time_iso_8601": "2019-02-17T15:08:45.328239Z",
"url": "https://files.pythonhosted.org/packages/ed/7b/5d3e1c12c4f3e96c1654805327449f03b44f979191d043b5a18628bc8e79/porder-0.1.7.tar.gz",
"yanked": false,
"yanked_reason": null
}
],
"0.1.8": [
{
"comment_text": "",
"digests": {
"md5": "c3d8b8c057a9562f6284552debdd18b2",
"sha256": "cc112d337782bc02f28a7a799721af387ba1d570f702c90fedc058be22bd7572"
},
"downloads": -1,
"filename": "porder-0.1.8.tar.gz",
"has_sig": false,
"md5_digest": "c3d8b8c057a9562f6284552debdd18b2",
"packagetype": "sdist",
"python_version": "source",
"requires_python": null,
"size": 25914,
"upload_time": "2019-02-19T23:05:32",
"upload_time_iso_8601": "2019-02-19T23:05:32.871181Z",
"url": "https://files.pythonhosted.org/packages/b2/ad/f578483e8b554849c80d8a54c32d122b329679b214529318f33d6e780584/porder-0.1.8.tar.gz",
"yanked": false,
"yanked_reason": null
}
],
"0.1.9": [
{
"comment_text": "",
"digests": {
"md5": "7d2cefac87e9f2c1341eda026deed4c7",
"sha256": "9283d4610b7b1c4fff4533131be726dba71cbeac397bd8ea1690163753c7f0f9"
},
"downloads": -1,
"filename": "porder-0.1.9.tar.gz",
"has_sig": false,
"md5_digest": "7d2cefac87e9f2c1341eda026deed4c7",
"packagetype": "sdist",
"python_version": "source",
"requires_python": null,
"size": 24120,
"upload_time": "2019-03-09T07:29:01",
"upload_time_iso_8601": "2019-03-09T07:29:01.446976Z",
"url": "https://files.pythonhosted.org/packages/9e/b9/ef94dd666dba1b740e7c77c2223091b88a38e521d58f2c729037968285d8/porder-0.1.9.tar.gz",
"yanked": false,
"yanked_reason": null
}
],
"0.2.0": [
{
"comment_text": "",
"digests": {
"md5": "d098e5e2fe328affa7f4a6c0126b0286",
"sha256": "45cf6e66cc588eafa1fdad7787c326b8aa365a740aed0d72cd539b967e99acef"
},
"downloads": -1,
"filename": "porder-0.2.0.tar.gz",
"has_sig": false,
"md5_digest": "d098e5e2fe328affa7f4a6c0126b0286",
"packagetype": "sdist",
"python_version": "source",
"requires_python": null,
"size": 24777,
"upload_time": "2019-03-16T20:53:00",
"upload_time_iso_8601": "2019-03-16T20:53:00.606159Z",
"url": "https://files.pythonhosted.org/packages/78/4e/578f992d6b9de39baafc20492b93c0cc20a2bc503ceff11430e6d399b757/porder-0.2.0.tar.gz",
"yanked": false,
"yanked_reason": null
}
],
"0.2.1": [
{
"comment_text": "",
"digests": {
"md5": "a85ee0a79a17157c43b7b40cc2a65387",
"sha256": "8d86b37a6c58e980f626331a334ed0453586fdf98900e1325ccd510cea927a11"
},
"downloads": -1,
"filename": "porder-0.2.1.tar.gz",
"has_sig": false,
"md5_digest": "a85ee0a79a17157c43b7b40cc2a65387",
"packagetype": "sdist",
"python_version": "source",
"requires_python": null,
"size": 24742,
"upload_time": "2019-03-18T14:18:47",
"upload_time_iso_8601": "2019-03-18T14:18:47.967724Z",
"url": "https://files.pythonhosted.org/packages/e9/c7/b8d29061d81421183146412a670b8e210530e22ae0de5d35104cf1d855ba/porder-0.2.1.tar.gz",
"yanked": false,
"yanked_reason": null
}
],
"0.2.2": [
{
"comment_text": "",
"digests": {
"md5": "ec5916665584625b3ee3ff5ee13429fa",
"sha256": "97c9be321da541c2e45a391b1e6769b15bfac97ea87ea3ff8288f3e94af1ede5"
},
"downloads": -1,
"filename": "porder-0.2.2.tar.gz",
"has_sig": false,
"md5_digest": "ec5916665584625b3ee3ff5ee13429fa",
"packagetype": "sdist",
"python_version": "source",
"requires_python": null,
"size": 25191,
"upload_time": "2019-03-30T04:56:18",
"upload_time_iso_8601": "2019-03-30T04:56:18.588501Z",
"url": "https://files.pythonhosted.org/packages/1a/a7/175fb398d8c5bf5281fddd77cc339ef9da262620d82ca8ae436a7fea6a9c/porder-0.2.2.tar.gz",
"yanked": false,
"yanked_reason": null
}
],
"0.2.3": [
{
"comment_text": "",
"digests": {
"md5": "2e59a91c3a20ed349ba7d8965a9adfa2",
"sha256": "593584b630abbfaf4e7a3c80eb38ca41b664e2d35753b0fd2ec4841554fecf45"
},
"downloads": -1,
"filename": "porder-0.2.3.tar.gz",
"has_sig": false,
"md5_digest": "2e59a91c3a20ed349ba7d8965a9adfa2",
"packagetype": "sdist",
"python_version": "source",
"requires_python": null,
"size": 25178,
"upload_time": "2019-04-01T11:47:15",
"upload_time_iso_8601": "2019-04-01T11:47:15.130794Z",
"url": "https://files.pythonhosted.org/packages/bb/46/23afa338c1099ec32649792e2a36a5968100b6e284cd7ab99361146941a0/porder-0.2.3.tar.gz",
"yanked": false,
"yanked_reason": null
}
],
"0.2.4": [
{
"comment_text": "",
"digests": {
"md5": "59fc712fc635e3396df1f5292c2c11d6",
"sha256": "1e83f8beba75331a267ee6808b2c279ca37c92bbd8054c55f999d14a6bfc53a2"
},
"downloads": -1,
"filename": "porder-0.2.4.tar.gz",
"has_sig": false,
"md5_digest": "59fc712fc635e3396df1f5292c2c11d6",
"packagetype": "sdist",
"python_version": "source",
"requires_python": null,
"size": 27403,
"upload_time": "2019-04-05T20:25:36",
"upload_time_iso_8601": "2019-04-05T20:25:36.667160Z",
"url": "https://files.pythonhosted.org/packages/71/6f/1f646cbfba15df56623f38f55761751aea4507e7f95eed86aafd625508cf/porder-0.2.4.tar.gz",
"yanked": false,
"yanked_reason": null
}
],
"0.2.5": [
{
"comment_text": "",
"digests": {
"md5": "7c574e4174dbc265eaa91fd7605e78a2",
"sha256": "3c8f0efabd9960e80039d59bd8d963930574b8c3c4a19a71fbcde89de4c8fe27"
},
"downloads": -1,
"filename": "porder-0.2.5.tar.gz",
"has_sig": false,
"md5_digest": "7c574e4174dbc265eaa91fd7605e78a2",
"packagetype": "sdist",
"python_version": "source",
"requires_python": null,
"size": 27358,
"upload_time": "2019-04-06T15:07:59",
"upload_time_iso_8601": "2019-04-06T15:07:59.058692Z",
"url": "https://files.pythonhosted.org/packages/64/16/3a92369feb19d0d416477fc5a052cc61d6f930acbf29b3cd7d6fae95201e/porder-0.2.5.tar.gz",
"yanked": false,
"yanked_reason": null
}
],
"0.2.6": [
{
"comment_text": "",
"digests": {
"md5": "40374f3384f83a1b27ee8a7bbe0b0248",
"sha256": "14cd2b9c50acdfb03fbe8726d6928ef7a26f3a839d249d5852e5752a777b5a9d"
},
"downloads": -1,
"filename": "porder-0.2.6.tar.gz",
"has_sig": false,
"md5_digest": "40374f3384f83a1b27ee8a7bbe0b0248",
"packagetype": "sdist",
"python_version": "source",
"requires_python": null,
"size": 27502,
"upload_time": "2019-04-15T00:23:43",
"upload_time_iso_8601": "2019-04-15T00:23:43.377575Z",
"url": "https://files.pythonhosted.org/packages/0a/4c/2568fbbc2c0ac2d744baafaf0ea203847500da8419d5cfaa8f748780ada3/porder-0.2.6.tar.gz",
"yanked": false,
"yanked_reason": null
}
],
"0.2.7": [
{
"comment_text": "",
"digests": {
"md5": "bade17f9f5e1e32f32113795b0507d77",
"sha256": "fa5707f52539069832ddae95fab923e8ca69cd505b99f22e8341f081d3341a6b"
},
"downloads": -1,
"filename": "porder-0.2.7.tar.gz",
"has_sig": false,
"md5_digest": "bade17f9f5e1e32f32113795b0507d77",
"packagetype": "sdist",
"python_version": "source",
"requires_python": null,
"size": 28989,
"upload_time": "2019-04-25T19:53:38",
"upload_time_iso_8601": "2019-04-25T19:53:38.254941Z",
"url": "https://files.pythonhosted.org/packages/ba/18/79a91182dc1ab54080f3edd5f50701ce8a83f389457e26885956c70e060e/porder-0.2.7.tar.gz",
"yanked": false,
"yanked_reason": null
}
],
"0.2.8": [
{
"comment_text": "",
"digests": {
"md5": "c072404e1801248754baee091a4ed9a5",
"sha256": "22c0d7e9b407ab7b09a73551b37eae3d8591b8e24ee606d2fb53ea1055d486a9"
},
"downloads": -1,
"filename": "porder-0.2.8.tar.gz",
"has_sig": false,
"md5_digest": "c072404e1801248754baee091a4ed9a5",
"packagetype": "sdist",
"python_version": "source",
"requires_python": null,
"size": 29819,
"upload_time": "2019-04-30T02:47:28",
"upload_time_iso_8601": "2019-04-30T02:47:28.698777Z",
"url": "https://files.pythonhosted.org/packages/be/0b/e44c54ee36c3328f3c011f44f5ad624abe68f5cba7de8bc5bf69fb9aa861/porder-0.2.8.tar.gz",
"yanked": false,
"yanked_reason": null
}
],
"0.2.9": [
{
"comment_text": "",
"digests": {
"md5": "8379a7dbb83131d3dc83aacd6ce1ecc0",
"sha256": "87a34657242099272dc350599393992397d5af791868beea535719a8b7f6951d"
},
"downloads": -1,
"filename": "porder-0.2.9.tar.gz",
"has_sig": false,
"md5_digest": "8379a7dbb83131d3dc83aacd6ce1ecc0",
"packagetype": "sdist",
"python_version": "source",
"requires_python": null,
"size": 29822,
"upload_time": "2019-04-30T21:14:33",
"upload_time_iso_8601": "2019-04-30T21:14:33.994783Z",
"url": "https://files.pythonhosted.org/packages/5b/22/efbdfad69f3e518be13994118a954a2bea40cafb1d9eb51a3215b24fbdc4/porder-0.2.9.tar.gz",
"yanked": false,
"yanked_reason": null
}
],
"0.3.0": [
{
"comment_text": "",
"digests": {
"md5": "8e81af5084af9c37d74cf9c82bb007af",
"sha256": "1644eeb4e6c74b9cf4674607c736e8c939a20aecbb2649f56d1bbfde564a2709"
},
"downloads": -1,
"filename": "porder-0.3.0.tar.gz",
"has_sig": false,
"md5_digest": "8e81af5084af9c37d74cf9c82bb007af",
"packagetype": "sdist",
"python_version": "source",
"requires_python": null,
"size": 30082,
"upload_time": "2019-05-03T20:09:51",
"upload_time_iso_8601": "2019-05-03T20:09:51.016422Z",
"url": "https://files.pythonhosted.org/packages/fb/08/d68c9b53742bd3b85208467a4eac5a1aac77df88d0d31f737f83c31b1d05/porder-0.3.0.tar.gz",
"yanked": false,
"yanked_reason": null
}
],
"0.3.1": [
{
"comment_text": "",
"digests": {
"md5": "e1e263ad24d2c0ec521ff65461fe4b4c",
"sha256": "2d471d3cb6e84e14a34c0ed52841307788c0f868856d9b6ec221c3c51d5c5478"
},
"downloads": -1,
"filename": "porder-0.3.1-py2.py3-none-any.whl",
"has_sig": false,
"md5_digest": "e1e263ad24d2c0ec521ff65461fe4b4c",
"packagetype": "bdist_wheel",
"python_version": "py2.py3",
"requires_python": null,
"size": 36480,
"upload_time": "2019-05-10T18:08:17",
"upload_time_iso_8601": "2019-05-10T18:08:17.801429Z",
"url": "https://files.pythonhosted.org/packages/c0/5a/6329638bb268dfe3afe43c74b8a4d96c6ec72ecc1232a816bfe4056dc519/porder-0.3.1-py2.py3-none-any.whl",
"yanked": false,
"yanked_reason": null
},
{
"comment_text": "",
"digests": {
"md5": "ecab3805d4e3db9a46f7361b0dbd5978",
"sha256": "9304abf08dd96c4feca20b76777d228a483b867c0b1c91c0cbca75f80677ce4e"
},
"downloads": -1,
"filename": "porder-0.3.1.tar.gz",
"has_sig": false,
"md5_digest": "ecab3805d4e3db9a46f7361b0dbd5978",
"packagetype": "sdist",
"python_version": "source",
"requires_python": null,
"size": 31625,
"upload_time": "2019-05-10T18:08:19",
"upload_time_iso_8601": "2019-05-10T18:08:19.269608Z",
"url": "https://files.pythonhosted.org/packages/36/2f/46a8ec5890bc182bb334f96a23ea390c2bf619433c1ee948e52ddcbda66f/porder-0.3.1.tar.gz",
"yanked": false,
"yanked_reason": null
}
],
"0.3.2": [
{
"comment_text": "",
"digests": {
"md5": "e63e7fa4a6543857475ca916cb0f541c",
"sha256": "cc27f209c5a12c2eefe4abb69c748fcb287a1471c7f0509aad32abe96da1570e"
},
"downloads": -1,
"filename": "porder-0.3.2-py2.py3-none-any.whl",
"has_sig": false,
"md5_digest": "e63e7fa4a6543857475ca916cb0f541c",
"packagetype": "bdist_wheel",
"python_version": "py2.py3",
"requires_python": null,
"size": 37405,
"upload_time": "2019-05-20T19:49:33",
"upload_time_iso_8601": "2019-05-20T19:49:33.728769Z",
"url": "https://files.pythonhosted.org/packages/ea/9e/42d3adcbe71e53e40c20734175c3a2a8b1bc19a51444e5b704dd27e0f6d7/porder-0.3.2-py2.py3-none-any.whl",
"yanked": false,
"yanked_reason": null
},
{
"comment_text": "",
"digests": {
"md5": "02faa15a8ee183b190b15474f6610e47",
"sha256": "f3872faf68f56fc4ef7ed9b590571769223ab9d766312803d3d707822ea37cf2"
},
"downloads": -1,
"filename": "porder-0.3.2.tar.gz",
"has_sig": false,
"md5_digest": "02faa15a8ee183b190b15474f6610e47",
"packagetype": "sdist",
"python_version": "source",
"requires_python": null,
"size": 32958,
"upload_time": "2019-05-20T19:49:35",
"upload_time_iso_8601": "2019-05-20T19:49:35.459918Z",
"url": "https://files.pythonhosted.org/packages/61/43/305218d968f6f558f4f70b9d0697f9863386b9a00b4d97317e0fc83f7c72/porder-0.3.2.tar.gz",
"yanked": false,
"yanked_reason": null
}
],
"0.3.3": [
{
"comment_text": "",
"digests": {
"md5": "327ff6a15b64d1c51db08f6e1110a225",
"sha256": "03720c668c68556434a5bea500fd2fcb2e8847e0853f181db9ab92243a736260"
},
"downloads": -1,
"filename": "porder-0.3.3-py2.py3-none-any.whl",
"has_sig": false,
"md5_digest": "327ff6a15b64d1c51db08f6e1110a225",
"packagetype": "bdist_wheel",
"python_version": "py2.py3",
"requires_python": null,
"size": 37517,
"upload_time": "2019-05-27T21:30:40",
"upload_time_iso_8601": "2019-05-27T21:30:40.813491Z",
"url": "https://files.pythonhosted.org/packages/8e/9d/e3bf930da011865a01ad012e419991ef2deca6d8b5dacdd96f7f21a67471/porder-0.3.3-py2.py3-none-any.whl",
"yanked": false,
"yanked_reason": null
},
{
"comment_text": "",
"digests": {
"md5": "92ff1ef96e83a634ae1a4b049f35e13a",
"sha256": "98ef7dd80ecd8ef5a4eef3e38b2ae807d43c8b691565b4f616f1c0ff04bda958"
},
"downloads": -1,
"filename": "porder-0.3.3.tar.gz",
"has_sig": false,
"md5_digest": "92ff1ef96e83a634ae1a4b049f35e13a",
"packagetype": "sdist",
"python_version": "source",
"requires_python": null,
"size": 33166,
"upload_time": "2019-05-27T21:30:42",
"upload_time_iso_8601": "2019-05-27T21:30:42.560795Z",
"url": "https://files.pythonhosted.org/packages/d4/7f/82b0b5b042a6454bea9fb8de5d09ffb4734c57fefddbd5d135dde1316d9c/porder-0.3.3.tar.gz",
"yanked": false,
"yanked_reason": null
}
],
"0.3.4": [
{
"comment_text": "",
"digests": {
"md5": "874e03ba066d1295d133a2cd4b00ee8c",
"sha256": "9dec7a629dd73d7a6fc2e76c50f031e3177a8814470a78489bacbd62cdc630d4"
},
"downloads": -1,
"filename": "porder-0.3.4-py2.py3-none-any.whl",
"has_sig": false,
"md5_digest": "874e03ba066d1295d133a2cd4b00ee8c",
"packagetype": "bdist_wheel",
"python_version": "py2.py3",
"requires_python": null,
"size": 39608,
"upload_time": "2019-05-29T04:09:56",
"upload_time_iso_8601": "2019-05-29T04:09:56.332368Z",
"url": "https://files.pythonhosted.org/packages/7c/91/02182e977c796cd47c1ab5e62740f23e692ea1ecb543321b72421d96eaec/porder-0.3.4-py2.py3-none-any.whl",
"yanked": false,
"yanked_reason": null
},
{
"comment_text": "",
"digests": {
"md5": "28900319eb5a98dfe87c8af4265503d0",
"sha256": "61038e90c772e803a4a8a13760241bc83c6ef0af0fc647f9832b770601ec3a05"
},
"downloads": -1,
"filename": "porder-0.3.4.tar.gz",
"has_sig": false,
"md5_digest": "28900319eb5a98dfe87c8af4265503d0",
"packagetype": "sdist",
"python_version": "source",
"requires_python": null,
"size": 34569,
"upload_time": "2019-05-29T04:09:58",
"upload_time_iso_8601": "2019-05-29T04:09:58.139454Z",
"url": "https://files.pythonhosted.org/packages/f8/00/35b54b6be0dcf65684e411cad2fcd7388736a9cdbe178558e60174f8b849/porder-0.3.4.tar.gz",
"yanked": false,
"yanked_reason": null
}
],
"0.3.5": [
{
"comment_text": "",
"digests": {
"md5": "443dbcc7e38c4ab19ced7ac1bbdd268d",
"sha256": "e97c52d7a8637d5580d8f18842c1fdb1e541d8c926ca466d9f04a4326db67a48"
},
"downloads": -1,
"filename": "porder-0.3.5-py2.py3-none-any.whl",
"has_sig": false,
"md5_digest": "443dbcc7e38c4ab19ced7ac1bbdd268d",
"packagetype": "bdist_wheel",
"python_version": "py2.py3",
"requires_python": null,
"size": 39207,
"upload_time": "2019-06-30T14:02:45",
"upload_time_iso_8601": "2019-06-30T14:02:45.225122Z",
"url": "https://files.pythonhosted.org/packages/eb/88/184de0e28c8d2ae12e9d201cf71cae2c859c9b046c4805996453b30b695c/porder-0.3.5-py2.py3-none-any.whl",
"yanked": false,
"yanked_reason": null
},
{
"comment_text": "",
"digests": {
"md5": "025cc5dfc19e6de3aff597b5a355ed53",
"sha256": "8b90a6e2095e58b88eca41fd2b41186d56eeffdc38ec269fb89f51a62acb6cdd"
},
"downloads": -1,
"filename": "porder-0.3.5.tar.gz",
"has_sig": false,
"md5_digest": "025cc5dfc19e6de3aff597b5a355ed53",
"packagetype": "sdist",
"python_version": "source",
"requires_python": null,
"size": 34727,
"upload_time": "2019-06-30T14:02:47",
"upload_time_iso_8601": "2019-06-30T14:02:47.269549Z",
"url": "https://files.pythonhosted.org/packages/2f/9e/4131fe2cc71cdb84e1e7062d1ed12ac8b0362f1054a07e68db081666c526/porder-0.3.5.tar.gz",
"yanked": false,
"yanked_reason": null
}
],
"0.3.6": [
{
"comment_text": "",
"digests": {
"md5": "e2a193f3d999e38730988306078554b3",
"sha256": "aa422a539241e297a55c1cea87baac01ee3750c2878bba13159197f6f07fb74a"
},
"downloads": -1,
"filename": "porder-0.3.6-py2.py3-none-any.whl",
"has_sig": false,
"md5_digest": "e2a193f3d999e38730988306078554b3",
"packagetype": "bdist_wheel",
"python_version": "py2.py3",
"requires_python": null,
"size": 40307,
"upload_time": "2019-07-13T12:49:35",
"upload_time_iso_8601": "2019-07-13T12:49:35.241083Z",
"url": "https://files.pythonhosted.org/packages/74/89/08e61d615ecc44de7a9ed6a9cac32a289e3e54c3aa6b7a8d920a634ec868/porder-0.3.6-py2.py3-none-any.whl",
"yanked": false,
"yanked_reason": null
},
{
"comment_text": "",
"digests": {
"md5": "c0c037ff13e13c4743ad721398a15e2b",
"sha256": "97b881528b5a1ba53ffef18220b1344027ccd0af1b3282aeee4e6b159af8dc5b"
},
"downloads": -1,
"filename": "porder-0.3.6.tar.gz",
"has_sig": false,
"md5_digest": "c0c037ff13e13c4743ad721398a15e2b",
"packagetype": "sdist",
"python_version": "source",
"requires_python": null,
"size": 37050,
"upload_time": "2019-07-13T12:49:36",
"upload_time_iso_8601": "2019-07-13T12:49:36.912354Z",
"url": "https://files.pythonhosted.org/packages/16/de/9ee828483508688f5bfe0cf160ccdd1e70ec0f4e2a504328ec1e56c68443/porder-0.3.6.tar.gz",
"yanked": false,
"yanked_reason": null
}
],
"0.3.7": [
{
"comment_text": "",
"digests": {
"md5": "24243c11dd42424f78cae6883dab0d8d",
"sha256": "0aaaa44247d6f5558b6252babead62dadebf50cff26210233056503b91cbd744"
},
"downloads": -1,
"filename": "porder-0.3.7-py2.py3-none-any.whl",
"has_sig": false,
"md5_digest": "24243c11dd42424f78cae6883dab0d8d",
"packagetype": "bdist_wheel",
"python_version": "py2.py3",
"requires_python": null,
"size": 40399,
"upload_time": "2019-07-15T21:17:05",
"upload_time_iso_8601": "2019-07-15T21:17:05.354358Z",
"url": "https://files.pythonhosted.org/packages/d5/e7/3234cbd82aab0e7f324e9260ec54fc4beec7e4443ff363b5dc710cecc466/porder-0.3.7-py2.py3-none-any.whl",
"yanked": false,
"yanked_reason": null
},
{
"comment_text": "",
"digests": {
"md5": "747a601ca5b9adb1b61a2dc558d8229c",
"sha256": "c668f192003090e2c65eec9ed8a11fa65f81ecce9b472d441d28f4a2af9565b5"
},
"downloads": -1,
"filename": "porder-0.3.7.tar.gz",
"has_sig": false,
"md5_digest": "747a601ca5b9adb1b61a2dc558d8229c",
"packagetype": "sdist",
"python_version": "source",
"requires_python": null,
"size": 37164,
"upload_time": "2019-07-15T21:17:07",
"upload_time_iso_8601": "2019-07-15T21:17:07.187198Z",
"url": "https://files.pythonhosted.org/packages/fb/82/c48e75ca27fc7433c7144af19508f136f136cb247accf7b077f62d04ae67/porder-0.3.7.tar.gz",
"yanked": false,
"yanked_reason": null
}
],
"0.3.8": [
{
"comment_text": "",
"digests": {
"md5": "a3be2581d552ae2106a873e960da11aa",
"sha256": "6785a160fc7252a406cfc3be6e033a9b48fc4e8998efaa01736d42c5faf50181"
},
"downloads": -1,
"filename": "porder-0.3.8-py2.py3-none-any.whl",
"has_sig": false,
"md5_digest": "a3be2581d552ae2106a873e960da11aa",
"packagetype": "bdist_wheel",
"python_version": "py2.py3",
"requires_python": null,
"size": 41111,
"upload_time": "2019-07-23T12:22:20",
"upload_time_iso_8601": "2019-07-23T12:22:20.824581Z",
"url": "https://files.pythonhosted.org/packages/89/1f/e0a9d8c2a0bc73b7bbb25a4d85e22ef9a9d36e0a8cf5c2aa2caa5388e07e/porder-0.3.8-py2.py3-none-any.whl",
"yanked": false,
"yanked_reason": null
},
{
"comment_text": "",
"digests": {
"md5": "eaf8cfc64637a8951b40fbd0acb19f54",
"sha256": "379fb2e19128f6c0db6df7f4db3d838056e67c1e4ebaeec1eb2e68af3a7f91e7"
},
"downloads": -1,
"filename": "porder-0.3.8.tar.gz",
"has_sig": false,
"md5_digest": "eaf8cfc64637a8951b40fbd0acb19f54",
"packagetype": "sdist",
"python_version": "source",
"requires_python": null,
"size": 38008,
"upload_time": "2019-07-23T12:22:22",
"upload_time_iso_8601": "2019-07-23T12:22:22.454477Z",
"url": "https://files.pythonhosted.org/packages/25/be/c0be05bb582befd2765ae7b9f4d12caf0debb45a28fe090b811fe15b9139/porder-0.3.8.tar.gz",
"yanked": false,
"yanked_reason": null
}
],
"0.3.9": [
{
"comment_text": "",
"digests": {
"md5": "dcdbd2829cf419be25249fef3437f1e5",
"sha256": "acabbc2b2f1b742d8ccf91e5bc00bc0104864158c0873745a2e1f908276a9ba9"
},
"downloads": -1,
"filename": "porder-0.3.9-py2.py3-none-any.whl",
"has_sig": false,
"md5_digest": "dcdbd2829cf419be25249fef3437f1e5",
"packagetype": "bdist_wheel",
"python_version": "py2.py3",
"requires_python": null,
"size": 40851,
"upload_time": "2019-08-03T20:13:40",
"upload_time_iso_8601": "2019-08-03T20:13:40.737562Z",
"url": "https://files.pythonhosted.org/packages/2f/e1/7d7aaaa1ab4be6a0cd9e4a427bb4b74aab4456a62249aa2e0b3bc8f98b8c/porder-0.3.9-py2.py3-none-any.whl",
"yanked": false,
"yanked_reason": null
},
{
"comment_text": "",
"digests": {
"md5": "efe0c09192b107250ff4b769be81495f",
"sha256": "464dc909ac352072dbb3ae9bd6d2cd2aba65c4180e5797a95bd4300dac240f40"
},
"downloads": -1,
"filename": "porder-0.3.9.tar.gz",
"has_sig": false,
"md5_digest": "efe0c09192b107250ff4b769be81495f",
"packagetype": "sdist",
"python_version": "source",
"requires_python": null,
"size": 37735,
"upload_time": "2019-08-03T20:13:42",
"upload_time_iso_8601": "2019-08-03T20:13:42.519910Z",
"url": "https://files.pythonhosted.org/packages/32/58/2f34c668915f5004a593435050daa7469d41cc48bf9ed9cbfc97d029f392/porder-0.3.9.tar.gz",
"yanked": false,
"yanked_reason": null
}
],
"0.4.0": [
{
"comment_text": "",
"digests": {
"md5": "6bfd77cdc4fef661effbbda4f3d5f540",
"sha256": "8a4cac078032e81629739348c802b1e8a812cce427519a1a87e677727f437012"
},
"downloads": -1,
"filename": "porder-0.4.0-py2.py3-none-any.whl",
"has_sig": false,
"md5_digest": "6bfd77cdc4fef661effbbda4f3d5f540",
"packagetype": "bdist_wheel",
"python_version": "py2.py3",
"requires_python": null,
"size": 41198,
"upload_time": "2019-08-19T01:40:30",
"upload_time_iso_8601": "2019-08-19T01:40:30.856349Z",
"url": "https://files.pythonhosted.org/packages/24/89/11a93bd9f9b2a661187253131404ff422dbd9c1b34fb9bef9369e04a57f1/porder-0.4.0-py2.py3-none-any.whl",
"yanked": false,
"yanked_reason": null
},
{
"comment_text": "",
"digests": {
"md5": "ee6cf8637ff04492be7358d924509f74",
"sha256": "3af30183a1a72d9ee3e68e42e395ca71912ef581a1c6f08190b6990ce8c3849a"
},
"downloads": -1,
"filename": "porder-0.4.0.tar.gz",
"has_sig": false,
"md5_digest": "ee6cf8637ff04492be7358d924509f74",
"packagetype": "sdist",
"python_version": "source",
"requires_python": null,
"size": 38273,
"upload_time": "2019-08-19T01:40:32",
"upload_time_iso_8601": "2019-08-19T01:40:32.320788Z",
"url": "https://files.pythonhosted.org/packages/dc/7d/a35a7166c867ce2bdb8d62238fa961eb0c27279f140787b24f546e9a114d/porder-0.4.0.tar.gz",
"yanked": false,
"yanked_reason": null
}
],
"0.4.1": [
{
"comment_text": "",
"digests": {
"md5": "b9877aef5b4749b05c95d18b76daab56",
"sha256": "6f71e845115b1c96130a0645972b2f99e0773b393df6685a1389d7f06730c815"
},
"downloads": -1,
"filename": "porder-0.4.1-py2.py3-none-any.whl",
"has_sig": false,
"md5_digest": "b9877aef5b4749b05c95d18b76daab56",
"packagetype": "bdist_wheel",
"python_version": "py2.py3",
"requires_python": null,
"size": 41409,
"upload_time": "2019-08-22T03:21:25",
"upload_time_iso_8601": "2019-08-22T03:21:25.393645Z",
"url": "https://files.pythonhosted.org/packages/21/85/c9908de71f777ed81b78f83724235680a42332ee8cf997060f6afe6716f0/porder-0.4.1-py2.py3-none-any.whl",
"yanked": false,
"yanked_reason": null
},
{
"comment_text": "",
"digests": {
"md5": "ab165a6577e9a05e5d0f6c362fd3f523",
"sha256": "44065655b9e6f9fe7fbd3917ffdb50b4f7ecc66ee9b7c6baa3742afbb8eb29b1"
},
"downloads": -1,
"filename": "porder-0.4.1.tar.gz",
"has_sig": false,
"md5_digest": "ab165a6577e9a05e5d0f6c362fd3f523",
"packagetype": "sdist",
"python_version": "source",
"requires_python": null,
"size": 38502,
"upload_time": "2019-08-22T03:21:27",
"upload_time_iso_8601": "2019-08-22T03:21:27.115438Z",
"url": "https://files.pythonhosted.org/packages/2c/66/b51c531a40c4bee4411f867beb4688438fa156e3f259dbf6d7bb6268ec0d/porder-0.4.1.tar.gz",
"yanked": false,
"yanked_reason": null
}
],
"0.4.2": [
{
"comment_text": "",
"digests": {
"md5": "e93c4636d92a2a40f6658c9137d02711",
"sha256": "272e6480d69e52117efae195b8e89b65361045f5bb2762f44574a91d335eb49d"
},
"downloads": -1,
"filename": "porder-0.4.2-py2.py3-none-any.whl",
"has_sig": false,
"md5_digest": "e93c4636d92a2a40f6658c9137d02711",
"packagetype": "bdist_wheel",
"python_version": "py2.py3",
"requires_python": null,
"size": 41933,
"upload_time": "2019-08-27T09:42:17",
"upload_time_iso_8601": "2019-08-27T09:42:17.407343Z",
"url": "https://files.pythonhosted.org/packages/b2/5a/d0fca56fe116e71d103ec0e07d7b6950c8e5e45ff029207df33a97260562/porder-0.4.2-py2.py3-none-any.whl",
"yanked": false,
"yanked_reason": null
},
{
"comment_text": "",
"digests": {
"md5": "33529e332631fe16d312df3fa58c3c13",
"sha256": "bbfb4ebe6c8d87c54c1f673a0a23c82bf82f3f54a1e0aec60c99d2b964f5410d"
},
"downloads": -1,
"filename": "porder-0.4.2.tar.gz",
"has_sig": false,
"md5_digest": "33529e332631fe16d312df3fa58c3c13",
"packagetype": "sdist",
"python_version": "source",
"requires_python": null,
"size": 40592,
"upload_time": "2019-08-27T09:42:19",
"upload_time_iso_8601": "2019-08-27T09:42:19.271813Z",
"url": "https://files.pythonhosted.org/packages/84/e8/23dfcec6b39310c7f19017bf449a401641a7f36f5f3309eb6039977f3505/porder-0.4.2.tar.gz",
"yanked": false,
"yanked_reason": null
}
],
"0.4.3": [
{
"comment_text": "",
"digests": {
"md5": "09b21a5376f6fea52f3fae1953d023b0",
"sha256": "4953cd8ad319b01992512c1fb68de6a8da0dab5222fc367359aab56b251c5ca1"
},
"downloads": -1,
"filename": "porder-0.4.3-py2.py3-none-any.whl",
"has_sig": false,
"md5_digest": "09b21a5376f6fea52f3fae1953d023b0",
"packagetype": "bdist_wheel",
"python_version": "py2.py3",
"requires_python": null,
"size": 42660,
"upload_time": "2019-08-28T15:33:07",
"upload_time_iso_8601": "2019-08-28T15:33:07.195970Z",
"url": "https://files.pythonhosted.org/packages/53/68/b810a4d254ce48acc6667c9facd2b7f85d7b6205f5c8ea561c319be1d29d/porder-0.4.3-py2.py3-none-any.whl",
"yanked": false,
"yanked_reason": null
},
{
"comment_text": "",
"digests": {
"md5": "3b330c1aba3b931e9380910721e562c7",
"sha256": "9b1bafebf8b7dfba00fcb36c85bb3dc35baf9a76699e3ea10539c9075d549dfd"
},
"downloads": -1,
"filename": "porder-0.4.3.tar.gz",
"has_sig": false,
"md5_digest": "3b330c1aba3b931e9380910721e562c7",
"packagetype": "sdist",
"python_version": "source",
"requires_python": null,
"size": 46878,
"upload_time": "2019-08-28T15:33:09",
"upload_time_iso_8601": "2019-08-28T15:33:09.158711Z",
"url": "https://files.pythonhosted.org/packages/0e/63/0d23f7bc02fb2a74a939b5ac454975de0f79d5fb5938f758b371043231bf/porder-0.4.3.tar.gz",
"yanked": false,
"yanked_reason": null
}
],
"0.4.4": [
{
"comment_text": "",
"digests": {
"md5": "5226b1f944199864fae6f2907ea6714f",
"sha256": "b9474b4444f4f76a69f8e758a500aec5fc1b5ad8845eb883996d85148b84c741"
},
"downloads": -1,
"filename": "porder-0.4.4-py2.py3-none-any.whl",
"has_sig": false,
"md5_digest": "5226b1f944199864fae6f2907ea6714f",
"packagetype": "bdist_wheel",
"python_version": "py2.py3",
"requires_python": null,
"size": 43429,
"upload_time": "2019-09-06T13:15:45",
"upload_time_iso_8601": "2019-09-06T13:15:45.840779Z",
"url": "https://files.pythonhosted.org/packages/03/e2/8fb74eba0e40cd39f33d4d72873a3153d01e579637db79121ceb21fc0371/porder-0.4.4-py2.py3-none-any.whl",
"yanked": false,
"yanked_reason": null
},
{
"comment_text": "",
"digests": {
"md5": "898223e21efeef1acb18c6adf9639fc4",
"sha256": "a1ad916da6fbc35abc541f037ef83e05860dcdbc83b48cb5ca443ed5813e59da"
},
"downloads": -1,
"filename": "porder-0.4.4.tar.gz",
"has_sig": false,
"md5_digest": "898223e21efeef1acb18c6adf9639fc4",
"packagetype": "sdist",
"python_version": "source",
"requires_python": null,
"size": 47966,
"upload_time": "2019-09-06T13:15:47",
"upload_time_iso_8601": "2019-09-06T13:15:47.481217Z",
"url": "https://files.pythonhosted.org/packages/d2/92/ef84d5f29aadce73063d93e5e826179e4787321a623a7ac336f552ec931d/porder-0.4.4.tar.gz",
"yanked": false,
"yanked_reason": null
}
],
"0.4.5": [
{
"comment_text": "",
"digests": {
"md5": "c97cc7747b8ffab05a262c987b9f5844",
"sha256": "ba6a5efda0e42c52b191304041b2dee647c2e4041c5b890787b75d2b800c7c92"
},
"downloads": -1,
"filename": "porder-0.4.5-py2.py3-none-any.whl",
"has_sig": false,
"md5_digest": "c97cc7747b8ffab05a262c987b9f5844",
"packagetype": "bdist_wheel",
"python_version": "py2.py3",
"requires_python": null,
"size": 43596,
"upload_time": "2019-09-13T06:17:10",
"upload_time_iso_8601": "2019-09-13T06:17:10.130968Z",
"url": "https://files.pythonhosted.org/packages/e6/82/8e6321b363ec4a8545647df3524e162379b5052baf86d66672c0a881e375/porder-0.4.5-py2.py3-none-any.whl",
"yanked": false,
"yanked_reason": null
},
{
"comment_text": "",
"digests": {
"md5": "692849fcf6818ace57057ec3fdabf479",
"sha256": "f032a2d4b4d857b15d1c0e43f15739599c7cc8dae1bad6184c99681db4dcf68c"
},
"downloads": -1,
"filename": "porder-0.4.5.tar.gz",
"has_sig": false,
"md5_digest": "692849fcf6818ace57057ec3fdabf479",
"packagetype": "sdist",
"python_version": "source",
"requires_python": null,
"size": 48203,
"upload_time": "2019-09-13T06:17:12",
"upload_time_iso_8601": "2019-09-13T06:17:12.199223Z",
"url": "https://files.pythonhosted.org/packages/c3/52/99ed07dbd2364d1df36079cbab47338f9a3165ee7424d39491689df4de21/porder-0.4.5.tar.gz",
"yanked": false,
"yanked_reason": null
}
],
"0.4.6": [
{
"comment_text": "",
"digests": {
"md5": "fb3d3dec657c9f4741b40146b6eee3cb",
"sha256": "7edb706fe9a42ddced50a0b087f696a0ad1440defc59ac40832df1ba3429077b"
},
"downloads": -1,
"filename": "porder-0.4.6-py2.py3-none-any.whl",
"has_sig": false,
"md5_digest": "fb3d3dec657c9f4741b40146b6eee3cb",
"packagetype": "bdist_wheel",
"python_version": "py2.py3",
"requires_python": null,
"size": 44257,
"upload_time": "2019-09-15T07:17:22",
"upload_time_iso_8601": "2019-09-15T07:17:22.989294Z",
"url": "https://files.pythonhosted.org/packages/1f/49/831cb2fb9408acf48393a3d9074889b07a9bdb59bad23a63834bdc60d197/porder-0.4.6-py2.py3-none-any.whl",
"yanked": false,
"yanked_reason": null
},
{
"comment_text": "",
"digests": {
"md5": "555f230b0f4b8804249d3713b7261b36",
"sha256": "3afee3aaa85d2d17f44efe35ebc5d0d2ad2e6f5f65524d8280d6415237f793e1"
},
"downloads": -1,
"filename": "porder-0.4.6.tar.gz",
"has_sig": false,
"md5_digest": "555f230b0f4b8804249d3713b7261b36",
"packagetype": "sdist",
"python_version": "source",
"requires_python": null,
"size": 49897,
"upload_time": "2019-09-15T07:17:24",
"upload_time_iso_8601": "2019-09-15T07:17:24.718220Z",
"url": "https://files.pythonhosted.org/packages/81/ce/1f1497f0b141b39ede67ab6151bdd18fbffa4bbae661983938b59a408a39/porder-0.4.6.tar.gz",
"yanked": false,
"yanked_reason": null
}
],
"0.4.7": [
{
"comment_text": "",
"digests": {
"md5": "f3f5722ee1ebd8e18bc4f13cb07a6a7b",
"sha256": "26deeef49311272fd7172fd794b17bb02e366842ba9067bc07299bef3e372010"
},
"downloads": -1,
"filename": "porder-0.4.7-py2.py3-none-any.whl",
"has_sig": false,
"md5_digest": "f3f5722ee1ebd8e18bc4f13cb07a6a7b",
"packagetype": "bdist_wheel",
"python_version": "py2.py3",
"requires_python": null,
"size": 44305,
"upload_time": "2019-09-21T16:45:45",
"upload_time_iso_8601": "2019-09-21T16:45:45.821826Z",
"url": "https://files.pythonhosted.org/packages/12/f6/f0135412d275b06b618ad6af1e60a15337221758783d725419e18991d578/porder-0.4.7-py2.py3-none-any.whl",
"yanked": false,
"yanked_reason": null
},
{
"comment_text": "",
"digests": {
"md5": "c27aff627efdd0b90aad871305d2f62d",
"sha256": "ff77802d1ded5996069cf6584fecad4793588ce7d00e5f0d0250b29f69f8e857"
},
"downloads": -1,
"filename": "porder-0.4.7.tar.gz",
"has_sig": false,
"md5_digest": "c27aff627efdd0b90aad871305d2f62d",
"packagetype": "sdist",
"python_version": "source",
"requires_python": null,
"size": 49967,
"upload_time": "2019-09-21T16:45:47",
"upload_time_iso_8601": "2019-09-21T16:45:47.725704Z",
"url": "https://files.pythonhosted.org/packages/16/fa/7fc7402c4012d9f1fea10a009b0e9f4f1c09a156d87047489b615374e455/porder-0.4.7.tar.gz",
"yanked": false,
"yanked_reason": null
}
],
"0.4.8": [
{
"comment_text": "",
"digests": {
"md5": "ccaaebd5a0663f9f1e7384abbadc1d52",
"sha256": "3c3708c656382a742c6b908c2645fad600b865e0953671d338886d438fcbf450"
},
"downloads": -1,
"filename": "porder-0.4.8-py2.py3-none-any.whl",
"has_sig": false,
"md5_digest": "ccaaebd5a0663f9f1e7384abbadc1d52",
"packagetype": "bdist_wheel",
"python_version": "py2.py3",
"requires_python": null,
"size": 43602,
"upload_time": "2019-09-29T22:21:59",
"upload_time_iso_8601": "2019-09-29T22:21:59.661826Z",
"url": "https://files.pythonhosted.org/packages/8a/31/569fb5e6601d7403a4161b438b28fa341cbc1597ba2b3760d1d1a0ba3458/porder-0.4.8-py2.py3-none-any.whl",
"yanked": false,
"yanked_reason": null
},
{
"comment_text": "",
"digests": {
"md5": "7c2a5c21f79386a49da54906ad0d57f7",
"sha256": "72aad7bba6f3317aa7a7e27ff7890f6225e27f9b27d1308952b9797046f9f9b4"
},
"downloads": -1,
"filename": "porder-0.4.8.tar.gz",
"has_sig": false,
"md5_digest": "7c2a5c21f79386a49da54906ad0d57f7",
"packagetype": "sdist",
"python_version": "source",
"requires_python": null,
"size": 50270,
"upload_time": "2019-09-29T22:22:01",
"upload_time_iso_8601": "2019-09-29T22:22:01.862360Z",
"url": "https://files.pythonhosted.org/packages/5a/d0/c310b8bb4ade7fa21dc8fa5665f670839b1ac5b7e6ac6994b664ebb291bc/porder-0.4.8.tar.gz",
"yanked": false,
"yanked_reason": null
}
],
"0.4.9": [
{
"comment_text": "",
"digests": {
"md5": "c797123c03aa8defcafef51475a15f18",
"sha256": "7628c0f08f6a1f07e228664cbf2e6ffcb6f0eac85204d30aeb40ab51627c65c7"
},
"downloads": -1,
"filename": "porder-0.4.9-py2.py3-none-any.whl",
"has_sig": false,
"md5_digest": "c797123c03aa8defcafef51475a15f18",
"packagetype": "bdist_wheel",
"python_version": "py2.py3",
"requires_python": null,
"size": 43637,
"upload_time": "2019-10-10T04:52:52",
"upload_time_iso_8601": "2019-10-10T04:52:52.197864Z",
"url": "https://files.pythonhosted.org/packages/ea/f0/0a0b78c33f495112434f9db97ced048f706f73d1ed7a041df8d84d77e43c/porder-0.4.9-py2.py3-none-any.whl",
"yanked": false,
"yanked_reason": null
},
{
"comment_text": "",
"digests": {
"md5": "f09f0116d3ebbe9064c575ae20f8be39",
"sha256": "477d38cdd0073eaae486e2964456ab35bed3a2efdca35b2efcd69829462c7287"
},
"downloads": -1,
"filename": "porder-0.4.9.tar.gz",
"has_sig": false,
"md5_digest": "f09f0116d3ebbe9064c575ae20f8be39",
"packagetype": "sdist",
"python_version": "source",
"requires_python": null,
"size": 50344,
"upload_time": "2019-10-10T04:52:54",
"upload_time_iso_8601": "2019-10-10T04:52:54.385216Z",
"url": "https://files.pythonhosted.org/packages/a4/7d/ddac115a7f1a01fbb2da47dbb9f333f8e015f58617c8cbe3a52ff8b4a570/porder-0.4.9.tar.gz",
"yanked": false,
"yanked_reason": null
}
],
"0.5.0": [
{
"comment_text": "",
"digests": {
"md5": "584519d14e63110df7cf1cd1d930c839",
"sha256": "c545d6abc1385e356c66bc4bb3bbb7510a4bc2e9be518492e6c7564b7397258c"
},
"downloads": -1,
"filename": "porder-0.5.0-py2.py3-none-any.whl",
"has_sig": false,
"md5_digest": "584519d14e63110df7cf1cd1d930c839",
"packagetype": "bdist_wheel",
"python_version": "py2.py3",
"requires_python": null,
"size": 43643,
"upload_time": "2019-10-10T16:26:58",
"upload_time_iso_8601": "2019-10-10T16:26:58.358793Z",
"url": "https://files.pythonhosted.org/packages/fc/a3/e30048f04e8fbf1a81228576bd270df0678cf0387b13e0cc75f35ed75e33/porder-0.5.0-py2.py3-none-any.whl",
"yanked": false,
"yanked_reason": null
},
{
"comment_text": "",
"digests": {
"md5": "d69bc71c972392f5259a6aeb2ef1f78f",
"sha256": "e7a5809181c9612570f45bf6ad557600fef63c02fe27ef40184761dd4a336ec3"
},
"downloads": -1,
"filename": "porder-0.5.0.tar.gz",
"has_sig": false,
"md5_digest": "d69bc71c972392f5259a6aeb2ef1f78f",
"packagetype": "sdist",
"python_version": "source",
"requires_python": null,
"size": 50336,
"upload_time": "2019-10-10T16:27:00",
"upload_time_iso_8601": "2019-10-10T16:27:00.516231Z",
"url": "https://files.pythonhosted.org/packages/e0/3a/05092e705421ea4a0585ad6965df56ae0568b43c7528695e2fc568c445d2/porder-0.5.0.tar.gz",
"yanked": false,
"yanked_reason": null
}
],
"0.5.1": [
{
"comment_text": "",
"digests": {
"md5": "b4a242a5c3d28397f9bcc16e846c8529",
"sha256": "a7d73c61b25ae08defdd5ce57e6c63ff6e85afc1ead49a49baf950ccfe761da5"
},
"downloads": -1,
"filename": "porder-0.5.1-py2.py3-none-any.whl",
"has_sig": false,
"md5_digest": "b4a242a5c3d28397f9bcc16e846c8529",
"packagetype": "bdist_wheel",
"python_version": "py2.py3",
"requires_python": null,
"size": 43834,
"upload_time": "2019-10-17T13:34:54",
"upload_time_iso_8601": "2019-10-17T13:34:54.046779Z",
"url": "https://files.pythonhosted.org/packages/83/ff/66022713c3e43e98f1e9ff338f43cd2473689dcda9c96b05929d77c0f306/porder-0.5.1-py2.py3-none-any.whl",
"yanked": false,
"yanked_reason": null
},
{
"comment_text": "",
"digests": {
"md5": "6de97ae09d81f2ccbe19ca3f0874603c",
"sha256": "a0b2cc471896de20662222005dd44db12f19592b6d170e08c14ed90bb73d77af"
},
"downloads": -1,
"filename": "porder-0.5.1.tar.gz",
"has_sig": false,
"md5_digest": "6de97ae09d81f2ccbe19ca3f0874603c",
"packagetype": "sdist",
"python_version": "source",
"requires_python": null,
"size": 50672,
"upload_time": "2019-10-17T13:34:56",
"upload_time_iso_8601": "2019-10-17T13:34:56.598442Z",
"url": "https://files.pythonhosted.org/packages/4f/86/449757c6f37c5abdaa89dc62325ec8fbefb6f950030a8ec070f66d20192d/porder-0.5.1.tar.gz",
"yanked": false,
"yanked_reason": null
}
],
"0.5.2": [
{
"comment_text": "",
"digests": {
"md5": "0f69f9e2f6785abb908408891e31c7a2",
"sha256": "3df730770efd7dbd5e84a849e0955e589fda2e8f2b3c1b447658218bb7c7d62f"
},
"downloads": -1,
"filename": "porder-0.5.2-py2.py3-none-any.whl",
"has_sig": false,
"md5_digest": "0f69f9e2f6785abb908408891e31c7a2",
"packagetype": "bdist_wheel",
"python_version": "py2.py3",
"requires_python": null,
"size": 44091,
"upload_time": "2019-10-24T14:41:13",
"upload_time_iso_8601": "2019-10-24T14:41:13.336716Z",
"url": "https://files.pythonhosted.org/packages/9a/a8/4ec835cf757da9e4515b35a9b3750fd82d939edd8062f5b85cb3f8c0e2b1/porder-0.5.2-py2.py3-none-any.whl",
"yanked": false,
"yanked_reason": null
},
{
"comment_text": "",
"digests": {
"md5": "27526b44eab850be9b7a86ccf6085a30",
"sha256": "b14dbc4cc0cab97c508eb7797bed7ac31394ac3bd9085e620f7a9e2c6378b1b1"
},
"downloads": -1,
"filename": "porder-0.5.2.tar.gz",
"has_sig": false,
"md5_digest": "27526b44eab850be9b7a86ccf6085a30",
"packagetype": "sdist",
"python_version": "source",
"requires_python": null,
"size": 51133,
"upload_time": "2019-10-24T14:41:15",
"upload_time_iso_8601": "2019-10-24T14:41:15.634780Z",
"url": "https://files.pythonhosted.org/packages/e3/7f/332f90f6b48a68949edd9807b4d8fc9e75ec9d833b0860df42d023b58af1/porder-0.5.2.tar.gz",
"yanked": false,
"yanked_reason": null
}
],
"0.5.3": [
{
"comment_text": "",
"digests": {
"md5": "874adde530156addf159cd6c6ccde443",
"sha256": "7b3215ad6e146f71b97e1522394c3ae64af8e7025fd05dae50195b45cc45c8dc"
},
"downloads": -1,
"filename": "porder-0.5.3-py2.py3-none-any.whl",
"has_sig": false,
"md5_digest": "874adde530156addf159cd6c6ccde443",
"packagetype": "bdist_wheel",
"python_version": "py2.py3",
"requires_python": null,
"size": 44812,
"upload_time": "2019-11-03T23:19:03",
"upload_time_iso_8601": "2019-11-03T23:19:03.773936Z",
"url": "https://files.pythonhosted.org/packages/57/38/b64640f0003b789d77f28ede4b967ec5af1701953ad891722d08f30fa378/porder-0.5.3-py2.py3-none-any.whl",
"yanked": false,
"yanked_reason": null
},
{
"comment_text": "",
"digests": {
"md5": "8ef5c49db80f8d8d538f56ee427dfad2",
"sha256": "05f08c7f6292074221a234bcc1d64e74e6ee2ed5a79eb04fd1efe7cff3fc598d"
},
"downloads": -1,
"filename": "porder-0.5.3.tar.gz",
"has_sig": false,
"md5_digest": "8ef5c49db80f8d8d538f56ee427dfad2",
"packagetype": "sdist",
"python_version": "source",
"requires_python": null,
"size": 52779,
"upload_time": "2019-11-03T23:19:05",
"upload_time_iso_8601": "2019-11-03T23:19:05.731397Z",
"url": "https://files.pythonhosted.org/packages/db/d2/3e91151f130040b596bd09fbc9dfbef22644153b8fa7981d993aff98cfc1/porder-0.5.3.tar.gz",
"yanked": false,
"yanked_reason": null
}
],
"0.5.4": [
{
"comment_text": "",
"digests": {
"md5": "3dfc78d5e2364862667c1a31a081bb05",
"sha256": "f6d5f420a7998cdfbc14abda492195c56f39d1b3f42d9dcb5b02f1e43cc803b1"
},
"downloads": -1,
"filename": "porder-0.5.4-py2.py3-none-any.whl",
"has_sig": false,
"md5_digest": "3dfc78d5e2364862667c1a31a081bb05",
"packagetype": "bdist_wheel",
"python_version": "py2.py3",
"requires_python": null,
"size": 44920,
"upload_time": "2019-11-06T06:28:03",
"upload_time_iso_8601": "2019-11-06T06:28:03.766031Z",
"url": "https://files.pythonhosted.org/packages/8e/e5/ed764384ff58edeb1997de6b13c6a9158e9c50fb233f20436ca7df79ddff/porder-0.5.4-py2.py3-none-any.whl",
"yanked": false,
"yanked_reason": null
},
{
"comment_text": "",
"digests": {
"md5": "b3cb89b1404ffcd5a914c1ef4d2d80c1",
"sha256": "4f447ed46a23fb3864924a634d2f27a981de4825b626cbe4b61b7377eb1bc6bc"
},
"downloads": -1,
"filename": "porder-0.5.4.tar.gz",
"has_sig": false,
"md5_digest": "b3cb89b1404ffcd5a914c1ef4d2d80c1",
"packagetype": "sdist",
"python_version": "source",
"requires_python": null,
"size": 53063,
"upload_time": "2019-11-06T06:28:05",
"upload_time_iso_8601": "2019-11-06T06:28:05.731629Z",
"url": "https://files.pythonhosted.org/packages/62/de/e3a82644731eebf19928651e886ccd5aae4f233c70536198e0cff001dffd/porder-0.5.4.tar.gz",
"yanked": false,
"yanked_reason": null
}
],
"0.5.5": [
{
"comment_text": "",
"digests": {
"md5": "2dc2750507864b366b92e66578360c6e",
"sha256": "71deed64b6b6229df97cb356c676f4719126993ae1cbea90206a83d43b84dd6f"
},
"downloads": -1,
"filename": "porder-0.5.5-py2.py3-none-any.whl",
"has_sig": false,
"md5_digest": "2dc2750507864b366b92e66578360c6e",
"packagetype": "bdist_wheel",
"python_version": "py2.py3",
"requires_python": null,
"size": 45162,
"upload_time": "2019-11-08T16:50:28",
"upload_time_iso_8601": "2019-11-08T16:50:28.655481Z",
"url": "https://files.pythonhosted.org/packages/e8/40/721d32ffa5c697cf831d1d6f1441a1ce4b41abdc20787504a92e2be6ee66/porder-0.5.5-py2.py3-none-any.whl",
"yanked": false,
"yanked_reason": null
},
{
"comment_text": "",
"digests": {
"md5": "e11a74b9f7c4f81443be3c5f9fbf6927",
"sha256": "00639b52971d18f919a31e336fdf7e58da57524d968810cdafdcd8571644784a"
},
"downloads": -1,
"filename": "porder-0.5.5.tar.gz",
"has_sig": false,
"md5_digest": "e11a74b9f7c4f81443be3c5f9fbf6927",
"packagetype": "sdist",
"python_version": "source",
"requires_python": null,
"size": 53195,
"upload_time": "2019-11-08T16:50:30",
"upload_time_iso_8601": "2019-11-08T16:50:30.466692Z",
"url": "https://files.pythonhosted.org/packages/80/21/28f81b3a93c8ea9b05c47757c5c033ce110f52fb2d7e9c488d51957104e7/porder-0.5.5.tar.gz",
"yanked": false,
"yanked_reason": null
}
],
"0.5.6": [
{
"comment_text": "",
"digests": {
"md5": "9e0878952cfe904cbf9034fcc68dd905",
"sha256": "b5635b84d49174fc1b35dd8175e69c4827686a8e8b95466d5e631d15c7350c4d"
},
"downloads": -1,
"filename": "porder-0.5.6-py2.py3-none-any.whl",
"has_sig": false,
"md5_digest": "9e0878952cfe904cbf9034fcc68dd905",
"packagetype": "bdist_wheel",
"python_version": "py2.py3",
"requires_python": null,
"size": 46940,
"upload_time": "2019-11-15T21:45:35",
"upload_time_iso_8601": "2019-11-15T21:45:35.095618Z",
"url": "https://files.pythonhosted.org/packages/bf/8c/14282f1db1425a114aa316ba1ac83f58779c022ebbec29d8e6e74c086490/porder-0.5.6-py2.py3-none-any.whl",
"yanked": false,
"yanked_reason": null
},
{
"comment_text": "",
"digests": {
"md5": "3406a81da6ab32944fac11a76052c669",
"sha256": "f4bdb183f7d2b5bfe951b90d05feb175a83c10b0a96eb83c1690e56a82b1623d"
},
"downloads": -1,
"filename": "porder-0.5.6.tar.gz",
"has_sig": false,
"md5_digest": "3406a81da6ab32944fac11a76052c669",
"packagetype": "sdist",
"python_version": "source",
"requires_python": null,
"size": 55059,
"upload_time": "2019-11-15T21:45:36",
"upload_time_iso_8601": "2019-11-15T21:45:36.994171Z",
"url": "https://files.pythonhosted.org/packages/4d/d2/afbda80f77c81b5a3727e1795cbd3052752f3f357c494e424db902dc98a1/porder-0.5.6.tar.gz",
"yanked": false,
"yanked_reason": null
}
],
"0.5.7": [
{
"comment_text": "",
"digests": {
"md5": "fad954d9d915a2a1f247b9cbcc44fbcd",
"sha256": "8b2465711b96ade6ae9798812c5583c67327ad0e7c6a7fdf37857e50a86e327d"
},
"downloads": -1,
"filename": "porder-0.5.7-py2.py3-none-any.whl",
"has_sig": false,
"md5_digest": "fad954d9d915a2a1f247b9cbcc44fbcd",
"packagetype": "bdist_wheel",
"python_version": "py2.py3",
"requires_python": null,
"size": 47066,
"upload_time": "2019-11-19T16:29:21",
"upload_time_iso_8601": "2019-11-19T16:29:21.527251Z",
"url": "https://files.pythonhosted.org/packages/98/a2/5655f4598a07082eb99cdea82b92afef550d7de030bdc94c8a0006e9ef88/porder-0.5.7-py2.py3-none-any.whl",
"yanked": false,
"yanked_reason": null
},
{
"comment_text": "",
"digests": {
"md5": "6e936741ad6c820294ffc96bff108822",
"sha256": "35a9905db9b83872dec6f40b87ec2ecf14ea96ff38346190d34c0d37715be582"
},
"downloads": -1,
"filename": "porder-0.5.7.tar.gz",
"has_sig": false,
"md5_digest": "6e936741ad6c820294ffc96bff108822",
"packagetype": "sdist",
"python_version": "source",
"requires_python": null,
"size": 55402,
"upload_time": "2019-11-19T16:29:23",
"upload_time_iso_8601": "2019-11-19T16:29:23.102790Z",
"url": "https://files.pythonhosted.org/packages/c3/ca/0f8015fc69179f87942c4123ca03f4bed95992cca4a1cb1172ad22e955f2/porder-0.5.7.tar.gz",
"yanked": false,
"yanked_reason": null
}
],
"0.5.8": [
{
"comment_text": "",
"digests": {
"md5": "81e7906fb89b0a7e4bdc1bf3ba59273b",
"sha256": "c5987e2898a2b2009a84847885d05c4c0a1958300aec6720a6d22b8951d4ba0a"
},
"downloads": -1,
"filename": "porder-0.5.8-py2.py3-none-any.whl",
"has_sig": false,
"md5_digest": "81e7906fb89b0a7e4bdc1bf3ba59273b",
"packagetype": "bdist_wheel",
"python_version": "py2.py3",
"requires_python": null,
"size": 47361,
"upload_time": "2019-12-06T15:32:24",
"upload_time_iso_8601": "2019-12-06T15:32:24.748438Z",
"url": "https://files.pythonhosted.org/packages/57/53/06c3065a3edfca3f619c637b89a3c69c6653ec5a254e881323b8a32ead83/porder-0.5.8-py2.py3-none-any.whl",
"yanked": false,
"yanked_reason": null
},
{
"comment_text": "",
"digests": {
"md5": "e34783ea6d6a0076e89d36c678f46c73",
"sha256": "a856bedae03cd6adb2cfc693c7debf764294bd6d46b4fcb64b9a5c8f380d6188"
},
"downloads": -1,
"filename": "porder-0.5.8.tar.gz",
"has_sig": false,
"md5_digest": "e34783ea6d6a0076e89d36c678f46c73",
"packagetype": "sdist",
"python_version": "source",
"requires_python": null,
"size": 55923,
"upload_time": "2019-12-06T15:32:26",
"upload_time_iso_8601": "2019-12-06T15:32:26.699475Z",
"url": "https://files.pythonhosted.org/packages/c9/8a/66040fd4a66fd31960a949a1fd3e46a8c003c91e1c93c2ab3ab008dd614e/porder-0.5.8.tar.gz",
"yanked": false,
"yanked_reason": null
}
],
"0.5.9": [
{
"comment_text": "",
"digests": {
"md5": "4b46edfb720f5f77250ae86cc15245a3",
"sha256": "aad2cfdca3735ecb45594224d7577c764df1c43d3343864a58b8dc5cdce16160"
},
"downloads": -1,
"filename": "porder-0.5.9-py3-none-any.whl",
"has_sig": false,
"md5_digest": "4b46edfb720f5f77250ae86cc15245a3",
"packagetype": "bdist_wheel",
"python_version": "py3",
"requires_python": null,
"size": 51559,
"upload_time": "2019-12-14T10:34:05",
"upload_time_iso_8601": "2019-12-14T10:34:05.014339Z",
"url": "https://files.pythonhosted.org/packages/c9/f3/37c1bd7f658a586191a6bef0a8c8659c0271a2d5e36710cf73819cdf6385/porder-0.5.9-py3-none-any.whl",
"yanked": false,
"yanked_reason": null
},
{
"comment_text": "",
"digests": {
"md5": "09b884f5703744aa65910f223ae8e7ca",
"sha256": "6c24b1e694786af8542ea4821dde15c980a4c2e53084e355bfb77309eaf75b1e"
},
"downloads": -1,
"filename": "porder-0.5.9.tar.gz",
"has_sig": false,
"md5_digest": "09b884f5703744aa65910f223ae8e7ca",
"packagetype": "sdist",
"python_version": "source",
"requires_python": null,
"size": 56366,
"upload_time": "2019-12-14T10:34:06",
"upload_time_iso_8601": "2019-12-14T10:34:06.884414Z",
"url": "https://files.pythonhosted.org/packages/b8/f8/fd199db29c547845f73963414b3f97aa24f830f3869a6535cdf7618c1f43/porder-0.5.9.tar.gz",
"yanked": false,
"yanked_reason": null
}
],
"0.6.0": [
{
"comment_text": "",
"digests": {
"md5": "c6706da51fd295e121bdb369d19812a5",
"sha256": "5e5a85b4fbfb3f7d2bd6e0a74bb70df0580b153e7a5c901f70846ee5b022eb5f"
},
"downloads": -1,
"filename": "porder-0.6.0-py3-none-any.whl",
"has_sig": false,
"md5_digest": "c6706da51fd295e121bdb369d19812a5",
"packagetype": "bdist_wheel",
"python_version": "py3",
"requires_python": ">=2.7",
"size": 51673,
"upload_time": "2020-01-19T14:48:13",
"upload_time_iso_8601": "2020-01-19T14:48:13.734784Z",
"url": "https://files.pythonhosted.org/packages/6b/c2/c3a02069d373b5c02ceae94ef75abdb31a5d3bec1e75a837e6d2c041b696/porder-0.6.0-py3-none-any.whl",
"yanked": false,
"yanked_reason": null
}
],
"0.6.1": [
{
"comment_text": "",
"digests": {
"md5": "360bb9e418fdba63699b36751af5925f",
"sha256": "d046742a563ad4605a1cb2d38508b086963e24b7c2550fd4de99ac66435bc851"
},
"downloads": -1,
"filename": "porder-0.6.1-py3-none-any.whl",
"has_sig": false,
"md5_digest": "360bb9e418fdba63699b36751af5925f",
"packagetype": "bdist_wheel",
"python_version": "py3",
"requires_python": ">=2.7",
"size": 52140,
"upload_time": "2020-01-31T06:12:24",
"upload_time_iso_8601": "2020-01-31T06:12:24.763892Z",
"url": "https://files.pythonhosted.org/packages/31/e9/7d6ebe9e3b524f02d9ff631e66a229e8f4e2e37408bf3603c12938f18237/porder-0.6.1-py3-none-any.whl",
"yanked": false,
"yanked_reason": null
}
],
"0.6.2": [
{
"comment_text": "",
"digests": {
"md5": "b1fbc6927f9c5e700d7be4c25e3170a0",
"sha256": "beea5d7bb11f034ed914f4111c5653a0bb18e2d8d2a14a7e6cb2179d397a8ec4"
},
"downloads": -1,
"filename": "porder-0.6.2.tar.gz",
"has_sig": false,
"md5_digest": "b1fbc6927f9c5e700d7be4c25e3170a0",
"packagetype": "sdist",
"python_version": "source",
"requires_python": ">=2.7",
"size": 57710,
"upload_time": "2020-02-17T22:27:49",
"upload_time_iso_8601": "2020-02-17T22:27:49.884361Z",
"url": "https://files.pythonhosted.org/packages/35/49/1d347693eb4d2e87081adea3a7367cda65e5722046c295f409d853f83384/porder-0.6.2.tar.gz",
"yanked": false,
"yanked_reason": null
}
],
"0.6.3": [
{
"comment_text": "",
"digests": {
"md5": "15dec976306aef4ea140469d98f5dcff",
"sha256": "d5f25abdbde31b05d21041bc3b18befe15a30ac52afb35a26462c8aa642860e2"
},
"downloads": -1,
"filename": "porder-0.6.3-py3-none-any.whl",
"has_sig": false,
"md5_digest": "15dec976306aef4ea140469d98f5dcff",
"packagetype": "bdist_wheel",
"python_version": "py3",
"requires_python": ">=2.7",
"size": 52219,
"upload_time": "2020-02-18T04:13:38",
"upload_time_iso_8601": "2020-02-18T04:13:38.515383Z",
"url": "https://files.pythonhosted.org/packages/41/a9/79876765b95e506ebe61177386bba5c8ffae298f0bcc4ab2900a13db92e7/porder-0.6.3-py3-none-any.whl",
"yanked": false,
"yanked_reason": null
},
{
"comment_text": "",
"digests": {
"md5": "9777f92dce03044657c8d464b8278a3c",
"sha256": "cf193239563d4d83db152676950c0428404a5e473a909ad86288d3f0f7c19af1"
},
"downloads": -1,
"filename": "porder-0.6.3.tar.gz",
"has_sig": false,
"md5_digest": "9777f92dce03044657c8d464b8278a3c",
"packagetype": "sdist",
"python_version": "source",
"requires_python": ">=2.7",
"size": 57653,
"upload_time": "2020-02-18T04:13:40",
"upload_time_iso_8601": "2020-02-18T04:13:40.226948Z",
"url": "https://files.pythonhosted.org/packages/9f/86/a9dce6ca670685bfd4e4e4631eb3c90bfb4384546e8338715c93a5698999/porder-0.6.3.tar.gz",
"yanked": false,
"yanked_reason": null
}
],
"0.6.4": [
{
"comment_text": "",
"digests": {
"md5": "96c504663d9fd9738c00db532039afa5",
"sha256": "ec0420238c8f43d81c917fb69bd923dad678d7769aa5d42a51a32ccff24c6488"
},
"downloads": -1,
"filename": "porder-0.6.4-py3-none-any.whl",
"has_sig": false,
"md5_digest": "96c504663d9fd9738c00db532039afa5",
"packagetype": "bdist_wheel",
"python_version": "py3",
"requires_python": ">=2.7",
"size": 52236,
"upload_time": "2020-03-05T06:26:36",
"upload_time_iso_8601": "2020-03-05T06:26:36.236783Z",
"url": "https://files.pythonhosted.org/packages/e8/9c/fe44398b93f4d36441f9cf8d257f22768b4e62b97ebb15d6399ac18835e1/porder-0.6.4-py3-none-any.whl",
"yanked": false,
"yanked_reason": null
},
{
"comment_text": "",
"digests": {
"md5": "427d26c4f9363bceabef789d3d7fbec5",
"sha256": "84a7e85b757ccaa6b2d2678f91ccbac6dccee737b06115902c163c4e8e220d97"
},
"downloads": -1,
"filename": "porder-0.6.4.tar.gz",
"has_sig": false,
"md5_digest": "427d26c4f9363bceabef789d3d7fbec5",
"packagetype": "sdist",
"python_version": "source",
"requires_python": ">=2.7",
"size": 57729,
"upload_time": "2020-03-05T06:26:38",
"upload_time_iso_8601": "2020-03-05T06:26:38.108790Z",
"url": "https://files.pythonhosted.org/packages/02/f4/6928fdc89253ef389b038ecdd3aa2c2e421d5f5de22bc56bf3431c3b52c9/porder-0.6.4.tar.gz",
"yanked": false,
"yanked_reason": null
}
],
"0.6.5": [
{
"comment_text": "",
"digests": {
"md5": "20903bffdd251404835403ff3a8dabcb",
"sha256": "76000d16b1ea075858f1b208a689b9574407ad71b3d1184050c3990d2430a5da"
},
"downloads": -1,
"filename": "porder-0.6.5-py3-none-any.whl",
"has_sig": false,
"md5_digest": "20903bffdd251404835403ff3a8dabcb",
"packagetype": "bdist_wheel",
"python_version": "py3",
"requires_python": ">=2.7",
"size": 52531,
"upload_time": "2020-03-05T15:56:45",
"upload_time_iso_8601": "2020-03-05T15:56:45.775130Z",
"url": "https://files.pythonhosted.org/packages/aa/30/7f13ed99ceda0a744009c2dac556ce46e1f1b3aa6f6bd2883592cfd656d0/porder-0.6.5-py3-none-any.whl",
"yanked": false,
"yanked_reason": null
},
{
"comment_text": "",
"digests": {
"md5": "8b7842735d49dad92527ecbb6ade5607",
"sha256": "593ff2495a041772773eca65d1bb02f7ec2c22910c378b9960811468b1bd8638"
},
"downloads": -1,
"filename": "porder-0.6.5.tar.gz",
"has_sig": false,
"md5_digest": "8b7842735d49dad92527ecbb6ade5607",
"packagetype": "sdist",
"python_version": "source",
"requires_python": ">=2.7",
"size": 57937,
"upload_time": "2020-03-05T15:56:47",
"upload_time_iso_8601": "2020-03-05T15:56:47.143048Z",
"url": "https://files.pythonhosted.org/packages/a0/2a/54c5e942618036c15649576bf35becf595558eb494a406758d8f7aa4ae3d/porder-0.6.5.tar.gz",
"yanked": false,
"yanked_reason": null
}
],
"0.6.6": [
{
"comment_text": "",
"digests": {
"md5": "31416e791d007ae946abc6089449a460",
"sha256": "effd599eb4e23fdeb91c836ac9260539839db852cc8331ac8a7846daacb3376e"
},
"downloads": -1,
"filename": "porder-0.6.6-py3-none-any.whl",
"has_sig": false,
"md5_digest": "31416e791d007ae946abc6089449a460",
"packagetype": "bdist_wheel",
"python_version": "py3",
"requires_python": ">=2.7",
"size": 52580,
"upload_time": "2020-03-28T05:56:50",
"upload_time_iso_8601": "2020-03-28T05:56:50.730347Z",
"url": "https://files.pythonhosted.org/packages/bf/6e/e14cf4ef809154520746b5af416f2c6c75b8bc6b16d34ab33302db9edd6d/porder-0.6.6-py3-none-any.whl",
"yanked": false,
"yanked_reason": null
},
{
"comment_text": "",
"digests": {
"md5": "7e2e4f8c04d5b5613376224d407009c2",
"sha256": "a56edae99953b6906b5f75434bcf91a39c023a74d0f2dba43ef280355edad130"
},
"downloads": -1,
"filename": "porder-0.6.6.tar.gz",
"has_sig": false,
"md5_digest": "7e2e4f8c04d5b5613376224d407009c2",
"packagetype": "sdist",
"python_version": "source",
"requires_python": ">=2.7",
"size": 58096,
"upload_time": "2020-03-28T05:56:52",
"upload_time_iso_8601": "2020-03-28T05:56:52.581854Z",
"url": "https://files.pythonhosted.org/packages/7d/bd/87a2d3611c2e112533d17ac3702f6dc075f5693c14c8e6786139d3b51fcc/porder-0.6.6.tar.gz",
"yanked": false,
"yanked_reason": null
}
],
"0.6.7": [
{
"comment_text": "",
"digests": {
"md5": "cc449152cacb9f30be7cce5192a13879",
"sha256": "d17c7b916678cd56a550f7f0684338ccd8cedd9e3aa9857bec6e6ba9e5167fa0"
},
"downloads": -1,
"filename": "porder-0.6.7-py3-none-any.whl",
"has_sig": false,
"md5_digest": "cc449152cacb9f30be7cce5192a13879",
"packagetype": "bdist_wheel",
"python_version": "py3",
"requires_python": ">=2.7",
"size": 52621,
"upload_time": "2020-03-28T15:14:32",
"upload_time_iso_8601": "2020-03-28T15:14:32.090369Z",
"url": "https://files.pythonhosted.org/packages/1a/b4/c701dc61e730bfa253f8a0dc4d6db262ac0f41e831467030db729d728e1e/porder-0.6.7-py3-none-any.whl",
"yanked": false,
"yanked_reason": null
},
{
"comment_text": "",
"digests": {
"md5": "525937ee71e42c9616777d55311ca305",
"sha256": "418e5d671e63bba74bff43f9dd01aae78054e7e3c8089872b09d33255a9469b5"
},
"downloads": -1,
"filename": "porder-0.6.7.tar.gz",
"has_sig": false,
"md5_digest": "525937ee71e42c9616777d55311ca305",
"packagetype": "sdist",
"python_version": "source",
"requires_python": ">=2.7",
"size": 58150,
"upload_time": "2020-03-28T15:14:33",
"upload_time_iso_8601": "2020-03-28T15:14:33.792858Z",
"url": "https://files.pythonhosted.org/packages/9a/0a/91f530deb89c7735e142b3d6d5d91075f2d903bf64b91d2070c2939926f3/porder-0.6.7.tar.gz",
"yanked": false,
"yanked_reason": null
}
],
"0.6.8": [
{
"comment_text": "",
"digests": {
"md5": "210ab80669e02c5f16173ff0a561edd0",
"sha256": "28bc192e8c4963e0390663d3442683a7d37cf16c4beb1b04f076249cba187915"
},
"downloads": -1,
"filename": "porder-0.6.8-py3-none-any.whl",
"has_sig": false,
"md5_digest": "210ab80669e02c5f16173ff0a561edd0",
"packagetype": "bdist_wheel",
"python_version": "py3",
"requires_python": ">=2.7",
"size": 52932,
"upload_time": "2020-04-08T05:26:02",
"upload_time_iso_8601": "2020-04-08T05:26:02.420329Z",
"url": "https://files.pythonhosted.org/packages/b6/5f/f22c6efdf439d84bcd4d41ea9da6c84e0c8615f494905a0f009c79a03dba/porder-0.6.8-py3-none-any.whl",
"yanked": false,
"yanked_reason": null
},
{
"comment_text": "",
"digests": {
"md5": "58d862df9901e41d4abe7656985c489c",
"sha256": "aa8cafea264265bfdf2d1f48b2fec374976169cd24aacf9bb3596738ab05660c"
},
"downloads": -1,
"filename": "porder-0.6.8.tar.gz",
"has_sig": false,
"md5_digest": "58d862df9901e41d4abe7656985c489c",
"packagetype": "sdist",
"python_version": "source",
"requires_python": ">=2.7",
"size": 58488,
"upload_time": "2020-04-08T05:26:04",
"upload_time_iso_8601": "2020-04-08T05:26:04.288367Z",
"url": "https://files.pythonhosted.org/packages/d5/35/f06318c93391c76082aa0020eeb92a009fd2a9bd3d2c37c5a50986cef24a/porder-0.6.8.tar.gz",
"yanked": false,
"yanked_reason": null
}
],
"0.6.9": [
{
"comment_text": "",
"digests": {
"md5": "ac770b280f5af0cf8ceb18409e190d91",
"sha256": "1f0afda0a509d07ec7e5e743e828e1fd7ba24cb89abc1007e77370d1c20aa992"
},
"downloads": -1,
"filename": "porder-0.6.9-py3-none-any.whl",
"has_sig": false,
"md5_digest": "ac770b280f5af0cf8ceb18409e190d91",
"packagetype": "bdist_wheel",
"python_version": "py3",
"requires_python": ">=2.7",
"size": 53060,
"upload_time": "2020-04-11T06:13:10",
"upload_time_iso_8601": "2020-04-11T06:13:10.642325Z",
"url": "https://files.pythonhosted.org/packages/4d/4c/e588dd480b7e69d78fb3c0f5cfac6a041b77964c43e30f8cd36f05a5ba2d/porder-0.6.9-py3-none-any.whl",
"yanked": false,
"yanked_reason": null
},
{
"comment_text": "",
"digests": {
"md5": "d5ef12f7bd1d181d8cb5f8cd879e4751",
"sha256": "2b23283d7221ae25917a43a075d98439f465169dc932734c6434d5b29374b2a7"
},
"downloads": -1,
"filename": "porder-0.6.9.tar.gz",
"has_sig": false,
"md5_digest": "d5ef12f7bd1d181d8cb5f8cd879e4751",
"packagetype": "sdist",
"python_version": "source",
"requires_python": ">=2.7",
"size": 58698,
"upload_time": "2020-04-11T06:13:12",
"upload_time_iso_8601": "2020-04-11T06:13:12.257776Z",
"url": "https://files.pythonhosted.org/packages/a0/78/cf807b995740ea9ba27144b7338537ae541044a1f3c8c3c2510068a56350/porder-0.6.9.tar.gz",
"yanked": false,
"yanked_reason": null
}
],
"0.7.0": [
{
"comment_text": "",
"digests": {
"md5": "0091f773c86e1401c5d12a686fd426b0",
"sha256": "529a5f489590957b3ea875dcfac4ed23943ccfd3b64aca54faef0db41dc81c97"
},
"downloads": -1,
"filename": "porder-0.7.0-py3-none-any.whl",
"has_sig": false,
"md5_digest": "0091f773c86e1401c5d12a686fd426b0",
"packagetype": "bdist_wheel",
"python_version": "py3",
"requires_python": ">=2.7",
"size": 53671,
"upload_time": "2020-04-26T07:25:57",
"upload_time_iso_8601": "2020-04-26T07:25:57.359285Z",
"url": "https://files.pythonhosted.org/packages/70/2a/ee3a4181ca96593a8618e3a81c606bd86a40bc45b4a4a136fb9f14a8cc79/porder-0.7.0-py3-none-any.whl",
"yanked": false,
"yanked_reason": null
},
{
"comment_text": "",
"digests": {
"md5": "5cdf1bb01ccc7e89c291ad047c2c5445",
"sha256": "d4c475149bab223cadd74c5afa46163137709fa65a189f72b33aba92558e7912"
},
"downloads": -1,
"filename": "porder-0.7.0.tar.gz",
"has_sig": false,
"md5_digest": "5cdf1bb01ccc7e89c291ad047c2c5445",
"packagetype": "sdist",
"python_version": "source",
"requires_python": ">=2.7",
"size": 59176,
"upload_time": "2020-04-26T07:25:58",
"upload_time_iso_8601": "2020-04-26T07:25:58.931788Z",
"url": "https://files.pythonhosted.org/packages/43/31/2be456d60522888ac9c85704f1da2a9c4ef358876aca557bd798f64e60b4/porder-0.7.0.tar.gz",
"yanked": false,
"yanked_reason": null
}
],
"0.7.1": [
{
"comment_text": "",
"digests": {
"md5": "f701bc52c8f2205423bb4e82dc315977",
"sha256": "200a8c59b6a8708c1f47f564a1372fd9b13dcfdc831832bea4ca8f6b7bfb94bd"
},
"downloads": -1,
"filename": "porder-0.7.1-py3-none-any.whl",
"has_sig": false,
"md5_digest": "f701bc52c8f2205423bb4e82dc315977",
"packagetype": "bdist_wheel",
"python_version": "py3",
"requires_python": ">=2.7",
"size": 53443,
"upload_time": "2020-05-01T23:03:43",
"upload_time_iso_8601": "2020-05-01T23:03:43.312811Z",
"url": "https://files.pythonhosted.org/packages/69/db/4ef813139ac753ffe760ad97b94b375fd382077c1c2782cb5ccc320f34c5/porder-0.7.1-py3-none-any.whl",
"yanked": false,
"yanked_reason": null
},
{
"comment_text": "",
"digests": {
"md5": "6308c2d7cd259314e07e1765d570d2df",
"sha256": "8804c9bc358881712febaae7dd06fc7ec11788f27c3cedbebe4b2c08dcd4112b"
},
"downloads": -1,
"filename": "porder-0.7.1.tar.gz",
"has_sig": false,
"md5_digest": "6308c2d7cd259314e07e1765d570d2df",
"packagetype": "sdist",
"python_version": "source",
"requires_python": ">=2.7",
"size": 59851,
"upload_time": "2020-05-01T23:03:44",
"upload_time_iso_8601": "2020-05-01T23:03:44.671482Z",
"url": "https://files.pythonhosted.org/packages/d8/75/21c7eee86fa0f9de2ad3e876ae3664121e850d30c77332dc9b9ead31a780/porder-0.7.1.tar.gz",
"yanked": false,
"yanked_reason": null
}
],
"0.7.2": [
{
"comment_text": "",
"digests": {
"md5": "fa5a196804807e5a6a52c67acd7a5067",
"sha256": "e5ff66ec19aa9d3a055dd5aa8e662e5b06d8463a8810afa473e2a78f71107e9f"
},
"downloads": -1,
"filename": "porder-0.7.2-py3-none-any.whl",
"has_sig": false,
"md5_digest": "fa5a196804807e5a6a52c67acd7a5067",
"packagetype": "bdist_wheel",
"python_version": "py3",
"requires_python": ">=2.7",
"size": 53435,
"upload_time": "2020-05-02T05:30:33",
"upload_time_iso_8601": "2020-05-02T05:30:33.239418Z",
"url": "https://files.pythonhosted.org/packages/3a/3a/edac701dbef224c5c178a71efd267b49e54ab8d6d54c107d94556a51ecb4/porder-0.7.2-py3-none-any.whl",
"yanked": false,
"yanked_reason": null
},
{
"comment_text": "",
"digests": {
"md5": "e3a2bbf78a30865650a91ce1c826d96d",
"sha256": "f18fb73310b4f6a5ea9f501675809ae634afc650d32ca5b8ff486f88ba183655"
},
"downloads": -1,
"filename": "porder-0.7.2.tar.gz",
"has_sig": false,
"md5_digest": "e3a2bbf78a30865650a91ce1c826d96d",
"packagetype": "sdist",
"python_version": "source",
"requires_python": ">=2.7",
"size": 59837,
"upload_time": "2020-05-02T05:30:34",
"upload_time_iso_8601": "2020-05-02T05:30:34.417409Z",
"url": "https://files.pythonhosted.org/packages/07/cc/d8603ce25c8bf32a3bb449fe7328a2d696c3daf3483f250e0f907c1ed5a0/porder-0.7.2.tar.gz",
"yanked": false,
"yanked_reason": null
}
],
"0.7.3": [
{
"comment_text": "",
"digests": {
"md5": "900045becf410c22e26ed6f15accda47",
"sha256": "d39d7673197158e193c13a62f1478284a12b1411a70ec30127a569bb26a60953"
},
"downloads": -1,
"filename": "porder-0.7.3-py3-none-any.whl",
"has_sig": false,
"md5_digest": "900045becf410c22e26ed6f15accda47",
"packagetype": "bdist_wheel",
"python_version": "py3",
"requires_python": ">=2.7",
"size": 55375,
"upload_time": "2020-05-16T20:59:19",
"upload_time_iso_8601": "2020-05-16T20:59:19.787829Z",
"url": "https://files.pythonhosted.org/packages/f0/e1/6426d287320a255a873920f04aa5283ae6d3534791386fed6a23b1c9b12d/porder-0.7.3-py3-none-any.whl",
"yanked": false,
"yanked_reason": null
},
{
"comment_text": "",
"digests": {
"md5": "f3411809c194d9c605253495a376bd63",
"sha256": "de236609efeba1cf573a09259d0fc1d96b55a431c024115a4b068abd590646cb"
},
"downloads": -1,
"filename": "porder-0.7.3.tar.gz",
"has_sig": false,
"md5_digest": "f3411809c194d9c605253495a376bd63",
"packagetype": "sdist",
"python_version": "source",
"requires_python": ">=2.7",
"size": 61693,
"upload_time": "2020-05-16T20:59:21",
"upload_time_iso_8601": "2020-05-16T20:59:21.023123Z",
"url": "https://files.pythonhosted.org/packages/64/70/3d1bb61b92876d8be2d212a46e0cf776077fef350998d7474c8dc6d668cb/porder-0.7.3.tar.gz",
"yanked": false,
"yanked_reason": null
}
],
"0.7.4": [
{
"comment_text": "",
"digests": {
"md5": "54a9b2bd5ac68204f0f4d25de0d73ec5",
"sha256": "5667852b31c8cfc9d33d22f69fb972b17c284cdc08cabdb552139c0925833f4c"
},
"downloads": -1,
"filename": "porder-0.7.4-py3-none-any.whl",
"has_sig": false,
"md5_digest": "54a9b2bd5ac68204f0f4d25de0d73ec5",
"packagetype": "bdist_wheel",
"python_version": "py3",
"requires_python": ">=2.7",
"size": 55779,
"upload_time": "2020-05-19T07:21:06",
"upload_time_iso_8601": "2020-05-19T07:21:06.765084Z",
"url": "https://files.pythonhosted.org/packages/f5/08/f9df83456150c2c2910dcdeec260f63c7d017a640248757b462cd22c45e3/porder-0.7.4-py3-none-any.whl",
"yanked": false,
"yanked_reason": null
},
{
"comment_text": "",
"digests": {
"md5": "0306bd7c03294a2154513db37896f2ae",
"sha256": "cbc498855e06159e9bf1f8d56b75f203224d0cb428515b39751f47dc36c39f9a"
},
"downloads": -1,
"filename": "porder-0.7.4.tar.gz",
"has_sig": false,
"md5_digest": "0306bd7c03294a2154513db37896f2ae",
"packagetype": "sdist",
"python_version": "source",
"requires_python": ">=2.7",
"size": 62041,
"upload_time": "2020-05-19T07:21:08",
"upload_time_iso_8601": "2020-05-19T07:21:08.276682Z",
"url": "https://files.pythonhosted.org/packages/ed/73/98fa7a40758031e858a431dd7d7f647912876d5524741f40373031f34231/porder-0.7.4.tar.gz",
"yanked": false,
"yanked_reason": null
}
],
"0.7.5": [
{
"comment_text": "",
"digests": {
"md5": "e176c48d0fbff7e913a2fea9ac32900d",
"sha256": "79b2775b375b3f413aa8ce2a7682e6602a709a50b4586930f24fda92c9b5af66"
},
"downloads": -1,
"filename": "porder-0.7.5-py3-none-any.whl",
"has_sig": false,
"md5_digest": "e176c48d0fbff7e913a2fea9ac32900d",
"packagetype": "bdist_wheel",
"python_version": "py3",
"requires_python": ">=2.7",
"size": 55886,
"upload_time": "2020-05-29T08:43:44",
"upload_time_iso_8601": "2020-05-29T08:43:44.246403Z",
"url": "https://files.pythonhosted.org/packages/10/dd/666f02cc45a16b14e3c67580f3d2218b7ea492d0f9c507720ada9a842893/porder-0.7.5-py3-none-any.whl",
"yanked": false,
"yanked_reason": null
},
{
"comment_text": "",
"digests": {
"md5": "1e57b82e5c8c742d728ebdc1a0a80485",
"sha256": "672b5fc32129714899e0884bc2e73dabf1e42737d112170e5a2fbcfc306d360d"
},
"downloads": -1,
"filename": "porder-0.7.5.tar.gz",
"has_sig": false,
"md5_digest": "1e57b82e5c8c742d728ebdc1a0a80485",
"packagetype": "sdist",
"python_version": "source",
"requires_python": ">=2.7",
"size": 62351,
"upload_time": "2020-05-29T08:43:45",
"upload_time_iso_8601": "2020-05-29T08:43:45.459644Z",
"url": "https://files.pythonhosted.org/packages/f0/62/4fc789252ebe407487040e38fbf00f90754ca31697f79196aeac34f9ef70/porder-0.7.5.tar.gz",
"yanked": false,
"yanked_reason": null
}
],
"0.7.6": [
{
"comment_text": "",
"digests": {
"md5": "069af778006a5bf248b4cbe761a0c63c",
"sha256": "b2851878d7a8cabef02f438aca2c23cec911dc045575f769e193121298b73753"
},
"downloads": -1,
"filename": "porder-0.7.6-py3-none-any.whl",
"has_sig": false,
"md5_digest": "069af778006a5bf248b4cbe761a0c63c",
"packagetype": "bdist_wheel",
"python_version": "py3",
"requires_python": ">=2.7",
"size": 56031,
"upload_time": "2020-06-04T05:21:42",
"upload_time_iso_8601": "2020-06-04T05:21:42.195756Z",
"url": "https://files.pythonhosted.org/packages/f7/ce/2066debaaf1aba2e765fcf18ab6213bfd90993d0a87a8b733bbe48ea26b5/porder-0.7.6-py3-none-any.whl",
"yanked": false,
"yanked_reason": null
},
{
"comment_text": "",
"digests": {
"md5": "c0a47a8b97ca3c2c220655e98515732c",
"sha256": "78ca7a0b6bae99434ed2b4281c73dcc59862c9a3a931c75a727058839b453f00"
},
"downloads": -1,
"filename": "porder-0.7.6.tar.gz",
"has_sig": false,
"md5_digest": "c0a47a8b97ca3c2c220655e98515732c",
"packagetype": "sdist",
"python_version": "source",
"requires_python": ">=2.7",
"size": 62581,
"upload_time": "2020-06-04T05:21:43",
"upload_time_iso_8601": "2020-06-04T05:21:43.663265Z",
"url": "https://files.pythonhosted.org/packages/7b/a8/3745520c5279cdc8191c8219a9a31b855a7556dcf8b577a22540717e516d/porder-0.7.6.tar.gz",
"yanked": false,
"yanked_reason": null
}
],
"0.7.7": [
{
"comment_text": "",
"digests": {
"md5": "752855c3c532d4f5ce0e93f3a7a915b5",
"sha256": "a3b69f28ea2694cdad1a5f4244917a53e80d18e926913d82d6a3ec297c586a5d"
},
"downloads": -1,
"filename": "porder-0.7.7-py3-none-any.whl",
"has_sig": false,
"md5_digest": "752855c3c532d4f5ce0e93f3a7a915b5",
"packagetype": "bdist_wheel",
"python_version": "py3",
"requires_python": ">=3.4",
"size": 56161,
"upload_time": "2020-07-13T03:51:06",
"upload_time_iso_8601": "2020-07-13T03:51:06.121818Z",
"url": "https://files.pythonhosted.org/packages/94/10/768700fd05a83017562c1b94ce16f6a1f6a796795d1b2243771333846491/porder-0.7.7-py3-none-any.whl",
"yanked": false,
"yanked_reason": null
},
{
"comment_text": "",
"digests": {
"md5": "ef80b6a375204a78695ac0273360b2e5",
"sha256": "53070132bef5f86f5fa72f3987a1d20c6990a1a5bf10c6d2fa7ec9eb13afefcb"
},
"downloads": -1,
"filename": "porder-0.7.7.tar.gz",
"has_sig": false,
"md5_digest": "ef80b6a375204a78695ac0273360b2e5",
"packagetype": "sdist",
"python_version": "source",
"requires_python": ">=3.4",
"size": 63698,
"upload_time": "2020-07-13T03:51:07",
"upload_time_iso_8601": "2020-07-13T03:51:07.719625Z",
"url": "https://files.pythonhosted.org/packages/d0/91/eae39379473e355abd1ff361b70952676ee75d157590dd7b986c80944a94/porder-0.7.7.tar.gz",
"yanked": false,
"yanked_reason": null
}
],
"0.7.8": [
{
"comment_text": "",
"digests": {
"md5": "eeb78b76e3903ef735c8c07223ab3373",
"sha256": "af1e402f3da0e0f7bff3a182401aad0e014e948a97ffb992486151117574995a"
},
"downloads": -1,
"filename": "porder-0.7.8-py3-none-any.whl",
"has_sig": false,
"md5_digest": "eeb78b76e3903ef735c8c07223ab3373",
"packagetype": "bdist_wheel",
"python_version": "py3",
"requires_python": ">=3.4",
"size": 57970,
"upload_time": "2020-08-23T17:03:16",
"upload_time_iso_8601": "2020-08-23T17:03:16.247603Z",
"url": "https://files.pythonhosted.org/packages/44/5a/84ab64fbbd0866af7b59620e9e7e1d49f5e4f7c1b3c5de98b03ee6790174/porder-0.7.8-py3-none-any.whl",
"yanked": false,
"yanked_reason": null
},
{
"comment_text": "",
"digests": {
"md5": "4610bad7edeede0d90c0caf06009ddb3",
"sha256": "8b157808a5d691c7a6c3ebbf2a1038902cfbd619864a8edb79a07b7fd5a49169"
},
"downloads": -1,
"filename": "porder-0.7.8.tar.gz",
"has_sig": false,
"md5_digest": "4610bad7edeede0d90c0caf06009ddb3",
"packagetype": "sdist",
"python_version": "source",
"requires_python": ">=3.4",
"size": 64044,
"upload_time": "2020-08-23T17:03:18",
"upload_time_iso_8601": "2020-08-23T17:03:18.074572Z",
"url": "https://files.pythonhosted.org/packages/53/5d/8f7dba09f3332c1d220cc034be5a98a9ab1ec0e5b8c4cebb4469b7e51aa8/porder-0.7.8.tar.gz",
"yanked": false,
"yanked_reason": null
}
],
"0.7.9": [
{
"comment_text": "",
"digests": {
"md5": "76fb5925dd0770bd2fd2e95411a2c1a4",
"sha256": "ad059addfa62def87c74f74089fd09618117d51b052e55788744e8aba3f60122"
},
"downloads": -1,
"filename": "porder-0.7.9-py3-none-any.whl",
"has_sig": false,
"md5_digest": "76fb5925dd0770bd2fd2e95411a2c1a4",
"packagetype": "bdist_wheel",
"python_version": "py3",
"requires_python": ">=3.4",
"size": 58753,
"upload_time": "2020-10-17T05:40:55",
"upload_time_iso_8601": "2020-10-17T05:40:55.674257Z",
"url": "https://files.pythonhosted.org/packages/a2/08/f2ca01b6b30c7b25d326fad673cd63f7163e1e8f9c8082ee847780477979/porder-0.7.9-py3-none-any.whl",
"yanked": false,
"yanked_reason": null
},
{
"comment_text": "",
"digests": {
"md5": "69f4fa4a9734b1e1f15f8d6bd402162d",
"sha256": "34011b487bf2e0cec70f6d1514da5a99a7f5ce748b03e8dcafbc1513799365b6"
},
"downloads": -1,
"filename": "porder-0.7.9.tar.gz",
"has_sig": false,
"md5_digest": "69f4fa4a9734b1e1f15f8d6bd402162d",
"packagetype": "sdist",
"python_version": "source",
"requires_python": ">=3.4",
"size": 66531,
"upload_time": "2020-10-17T05:40:57",
"upload_time_iso_8601": "2020-10-17T05:40:57.053579Z",
"url": "https://files.pythonhosted.org/packages/9d/5e/b433dc20734dd318cbeb000e5ac606b05a20c09901495d679a6a76d17708/porder-0.7.9.tar.gz",
"yanked": false,
"yanked_reason": null
}
],
"0.8.0": [
{
"comment_text": "",
"digests": {
"md5": "96f53e8ba69961615e04d8c07b69824d",
"sha256": "127c7d69ad0166a5ac928fbf82685e73053e931cf54a1e875962cb5bddde6795"
},
"downloads": -1,
"filename": "porder-0.8.0-py3-none-any.whl",
"has_sig": false,
"md5_digest": "96f53e8ba69961615e04d8c07b69824d",
"packagetype": "bdist_wheel",
"python_version": "py3",
"requires_python": ">=3.4",
"size": 58870,
"upload_time": "2021-01-25T19:38:03",
"upload_time_iso_8601": "2021-01-25T19:38:03.170308Z",
"url": "https://files.pythonhosted.org/packages/a5/75/0ef6f69a1f26e91ef6ec5a8a52f31c787c9f94a0a9761f70300bf3530f39/porder-0.8.0-py3-none-any.whl",
"yanked": false,
"yanked_reason": null
},
{
"comment_text": "",
"digests": {
"md5": "d7faf47122e30990966d613b58358f8d",
"sha256": "90e450b1cf1245e28ada583582a92ccfca868ee60c49948c09faf2de066d30df"
},
"downloads": -1,
"filename": "porder-0.8.0.tar.gz",
"has_sig": false,
"md5_digest": "d7faf47122e30990966d613b58358f8d",
"packagetype": "sdist",
"python_version": "source",
"requires_python": ">=3.4",
"size": 67498,
"upload_time": "2021-01-25T19:38:04",
"upload_time_iso_8601": "2021-01-25T19:38:04.819138Z",
"url": "https://files.pythonhosted.org/packages/84/81/b5d059f3f7b04f426167c236aa00bda1951c1ee4d19a0b8d5d9f668e367f/porder-0.8.0.tar.gz",
"yanked": false,
"yanked_reason": null
}
],
"0.8.1": [
{
"comment_text": "",
"digests": {
"md5": "583af139229f5f96635598082b3eb78d",
"sha256": "4d354e836a6b56ed74b627e2880f323e28a236c055f743471b5d9565101b015b"
},
"downloads": -1,
"filename": "porder-0.8.1-py3-none-any.whl",
"has_sig": false,
"md5_digest": "583af139229f5f96635598082b3eb78d",
"packagetype": "bdist_wheel",
"python_version": "py3",
"requires_python": ">=3.4",
"size": 59530,
"upload_time": "2021-03-29T01:53:21",
"upload_time_iso_8601": "2021-03-29T01:53:21.403790Z",
"url": "https://files.pythonhosted.org/packages/08/73/7ee614b888f5b626072403aa1cd6d8984c353043906c5b3ebf02b0af2dc6/porder-0.8.1-py3-none-any.whl",
"yanked": false,
"yanked_reason": null
},
{
"comment_text": "",
"digests": {
"md5": "c57b5b873a97565375f2b4ea9e948b0c",
"sha256": "0d20149933d9ef231acfa235cf175f8dee7dd0977e8f199b664e378876f740f9"
},
"downloads": -1,
"filename": "porder-0.8.1.tar.gz",
"has_sig": false,
"md5_digest": "c57b5b873a97565375f2b4ea9e948b0c",
"packagetype": "sdist",
"python_version": "source",
"requires_python": ">=3.4",
"size": 68959,
"upload_time": "2021-03-29T01:53:23",
"upload_time_iso_8601": "2021-03-29T01:53:23.162156Z",
"url": "https://files.pythonhosted.org/packages/81/e4/c12a67d80c7612d05daf443135388b2b6360ed8626575c0afb11a2748a69/porder-0.8.1.tar.gz",
"yanked": false,
"yanked_reason": null
}
],
"0.8.2": [
{
"comment_text": "",
"digests": {
"md5": "f8abd65fb387b61e2220aa642902276d",
"sha256": "60c2fbb26bc57f6c4c43c814432613ed1d58a2b6a4953e9f29a00d6343bc8276"
},
"downloads": -1,
"filename": "porder-0.8.2-py3-none-any.whl",
"has_sig": false,
"md5_digest": "f8abd65fb387b61e2220aa642902276d",
"packagetype": "bdist_wheel",
"python_version": "py3",
"requires_python": ">=3.4",
"size": 59977,
"upload_time": "2021-06-16T05:23:10",
"upload_time_iso_8601": "2021-06-16T05:23:10.970555Z",
"url": "https://files.pythonhosted.org/packages/ca/74/944092a8e6cf82f9530e9b74fb734439bbb335cf822ed1b957a421e0a5f0/porder-0.8.2-py3-none-any.whl",
"yanked": false,
"yanked_reason": null
},
{
"comment_text": "",
"digests": {
"md5": "79d533d94be530c5f35fc5dfb7a6a9fd",
"sha256": "e996920286e5c0a1dd6dbf5bb3e30098ed522539c726d52c83ad7046778bd967"
},
"downloads": -1,
"filename": "porder-0.8.2.tar.gz",
"has_sig": false,
"md5_digest": "79d533d94be530c5f35fc5dfb7a6a9fd",
"packagetype": "sdist",
"python_version": "source",
"requires_python": ">=3.4",
"size": 68558,
"upload_time": "2021-06-16T05:23:12",
"upload_time_iso_8601": "2021-06-16T05:23:12.343856Z",
"url": "https://files.pythonhosted.org/packages/b8/5f/99327a497802b36b6bd5dae33ec9a3c7285eea43227206aefdf25f310162/porder-0.8.2.tar.gz",
"yanked": false,
"yanked_reason": null
}
],
"0.8.3": [
{
"comment_text": "",
"digests": {
"md5": "5082fe460ece5910e9d2a1cf4c3dbe39",
"sha256": "95f2c1ca32f766d1a4b1aa2b0198697435546eed0bf48c0bda973d2ed0cb74cd"
},
"downloads": -1,
"filename": "porder-0.8.3-py3-none-any.whl",
"has_sig": false,
"md5_digest": "5082fe460ece5910e9d2a1cf4c3dbe39",
"packagetype": "bdist_wheel",
"python_version": "py3",
"requires_python": ">=3.4",
"size": 59859,
"upload_time": "2021-06-29T14:41:42",
"upload_time_iso_8601": "2021-06-29T14:41:42.638723Z",
"url": "https://files.pythonhosted.org/packages/e9/38/f0e880c0cb256c54fe371287e2d91af57052ded2d10dd16b5deed3048264/porder-0.8.3-py3-none-any.whl",
"yanked": false,
"yanked_reason": null
},
{
"comment_text": "",
"digests": {
"md5": "37b6c1133e8f3427de49b8a7aeea4083",
"sha256": "1bb6ca7ba2a0c3acff98ccfbd8fa66f14ea8aa098668bea4a7ec8d65e8291950"
},
"downloads": -1,
"filename": "porder-0.8.3.tar.gz",
"has_sig": false,
"md5_digest": "37b6c1133e8f3427de49b8a7aeea4083",
"packagetype": "sdist",
"python_version": "source",
"requires_python": ">=3.4",
"size": 68509,
"upload_time": "2021-06-29T14:41:44",
"upload_time_iso_8601": "2021-06-29T14:41:44.333537Z",
"url": "https://files.pythonhosted.org/packages/4b/8e/7419bf48da09fb35416b4f0639ad39d6900779e571c4645d50030006543c/porder-0.8.3.tar.gz",
"yanked": false,
"yanked_reason": null
}
],
"0.8.4": [
{
"comment_text": "",
"digests": {
"md5": "bbaa4ac9343d5e28d1cb407cbf384daf",
"sha256": "d129bf436bcf59126b4e7c5625af61d366013391dfd90d966ccc308335f93fbc"
},
"downloads": -1,
"filename": "porder-0.8.4-py3-none-any.whl",
"has_sig": false,
"md5_digest": "bbaa4ac9343d5e28d1cb407cbf384daf",
"packagetype": "bdist_wheel",
"python_version": "py3",
"requires_python": ">=3.4",
"size": 59963,
"upload_time": "2021-07-08T08:29:13",
"upload_time_iso_8601": "2021-07-08T08:29:13.370325Z",
"url": "https://files.pythonhosted.org/packages/66/07/8d429390153448f9a90759f0f1e8e9e061e06bf83c8a6ebdcada8eba9c6d/porder-0.8.4-py3-none-any.whl",
"yanked": false,
"yanked_reason": null
},
{
"comment_text": "",
"digests": {
"md5": "e1e69f0972828ad01e0a3269e2a8d174",
"sha256": "fefeb4eab7b9464227b186bdf805469f7f8b80eb544f50eed88b87d4de6ba59d"
},
"downloads": -1,
"filename": "porder-0.8.4.tar.gz",
"has_sig": false,
"md5_digest": "e1e69f0972828ad01e0a3269e2a8d174",
"packagetype": "sdist",
"python_version": "source",
"requires_python": ">=3.4",
"size": 68842,
"upload_time": "2021-07-08T08:29:14",
"upload_time_iso_8601": "2021-07-08T08:29:14.961809Z",
"url": "https://files.pythonhosted.org/packages/67/c1/c1731af09191514c8ddc948083f273f04ffd0c3892efd39575e2bb902f3f/porder-0.8.4.tar.gz",
"yanked": false,
"yanked_reason": null
}
],
"0.8.5": [
{
"comment_text": "",
"digests": {
"md5": "571ee3305ac0b17887481fabf04fb37f",
"sha256": "44a06843166ba03317d610b9607b03b29d1786b69f32d1659a86716e5747a109"
},
"downloads": -1,
"filename": "porder-0.8.5-py3-none-any.whl",
"has_sig": false,
"md5_digest": "571ee3305ac0b17887481fabf04fb37f",
"packagetype": "bdist_wheel",
"python_version": "py3",
"requires_python": ">=3.4",
"size": 59987,
"upload_time": "2021-08-24T06:56:33",
"upload_time_iso_8601": "2021-08-24T06:56:33.088857Z",
"url": "https://files.pythonhosted.org/packages/19/0c/98a6a44c108a4ca74a4d37f7c7b99afa4dc9f58e7d10f1bc472de7fa6ff7/porder-0.8.5-py3-none-any.whl",
"yanked": false,
"yanked_reason": null
},
{
"comment_text": "",
"digests": {
"md5": "e3db10337b98857e7c6bffdb87c8ec39",
"sha256": "0cec09915e7ab24fdbbddf046b24d088dcd90a0d57639ebc01f93b01fdafb635"
},
"downloads": -1,
"filename": "porder-0.8.5.tar.gz",
"has_sig": false,
"md5_digest": "e3db10337b98857e7c6bffdb87c8ec39",
"packagetype": "sdist",
"python_version": "source",
"requires_python": ">=3.4",
"size": 68878,
"upload_time": "2021-08-24T06:56:34",
"upload_time_iso_8601": "2021-08-24T06:56:34.852625Z",
"url": "https://files.pythonhosted.org/packages/5a/02/141457efe45a1e2289e79f83c2fe90c32fc8377fd3b87374d31de9befb67/porder-0.8.5.tar.gz",
"yanked": false,
"yanked_reason": null
}
],
"0.8.6": [
{
"comment_text": "",
"digests": {
"md5": "12e6238e2a471b83d34dddeed198b33f",
"sha256": "019997fe646fcf256097c8b252ee3075b2ba8f161c4e796c72acc208ecec0744"
},
"downloads": -1,
"filename": "porder-0.8.6-py3-none-any.whl",
"has_sig": false,
"md5_digest": "12e6238e2a471b83d34dddeed198b33f",
"packagetype": "bdist_wheel",
"python_version": "py3",
"requires_python": ">=3.4",
"size": 60019,
"upload_time": "2021-08-24T08:32:25",
"upload_time_iso_8601": "2021-08-24T08:32:25.683346Z",
"url": "https://files.pythonhosted.org/packages/54/81/42395a1ae6312498ce721037f4bf78c8bdfed47219fec37347dfaba2127c/porder-0.8.6-py3-none-any.whl",
"yanked": false,
"yanked_reason": null
},
{
"comment_text": "",
"digests": {
"md5": "03252f552f8d80d2dbb72b0f6bc40c83",
"sha256": "dcf4f02992d5d3e377e1dbfcb8ef819deb43b6ca36f61672a98b1a6552191afc"
},
"downloads": -1,
"filename": "porder-0.8.6.tar.gz",
"has_sig": false,
"md5_digest": "03252f552f8d80d2dbb72b0f6bc40c83",
"packagetype": "sdist",
"python_version": "source",
"requires_python": ">=3.4",
"size": 68917,
"upload_time": "2021-08-24T08:32:27",
"upload_time_iso_8601": "2021-08-24T08:32:27.034805Z",
"url": "https://files.pythonhosted.org/packages/bb/28/b9eaeee142f919328ac62415c177ca28d581c6820695c1d1c8409982728f/porder-0.8.6.tar.gz",
"yanked": false,
"yanked_reason": null
}
]
},
"urls": [
{
"comment_text": "",
"digests": {
"md5": "12e6238e2a471b83d34dddeed198b33f",
"sha256": "019997fe646fcf256097c8b252ee3075b2ba8f161c4e796c72acc208ecec0744"
},
"downloads": -1,
"filename": "porder-0.8.6-py3-none-any.whl",
"has_sig": false,
"md5_digest": "12e6238e2a471b83d34dddeed198b33f",
"packagetype": "bdist_wheel",
"python_version": "py3",
"requires_python": ">=3.4",
"size": 60019,
"upload_time": "2021-08-24T08:32:25",
"upload_time_iso_8601": "2021-08-24T08:32:25.683346Z",
"url": "https://files.pythonhosted.org/packages/54/81/42395a1ae6312498ce721037f4bf78c8bdfed47219fec37347dfaba2127c/porder-0.8.6-py3-none-any.whl",
"yanked": false,
"yanked_reason": null
},
{
"comment_text": "",
"digests": {
"md5": "03252f552f8d80d2dbb72b0f6bc40c83",
"sha256": "dcf4f02992d5d3e377e1dbfcb8ef819deb43b6ca36f61672a98b1a6552191afc"
},
"downloads": -1,
"filename": "porder-0.8.6.tar.gz",
"has_sig": false,
"md5_digest": "03252f552f8d80d2dbb72b0f6bc40c83",
"packagetype": "sdist",
"python_version": "source",
"requires_python": ">=3.4",
"size": 68917,
"upload_time": "2021-08-24T08:32:27",
"upload_time_iso_8601": "2021-08-24T08:32:27.034805Z",
"url": "https://files.pythonhosted.org/packages/bb/28/b9eaeee142f919328ac62415c177ca28d581c6820695c1d1c8409982728f/porder-0.8.6.tar.gz",
"yanked": false,
"yanked_reason": null
}
],
"vulnerabilities": []
}